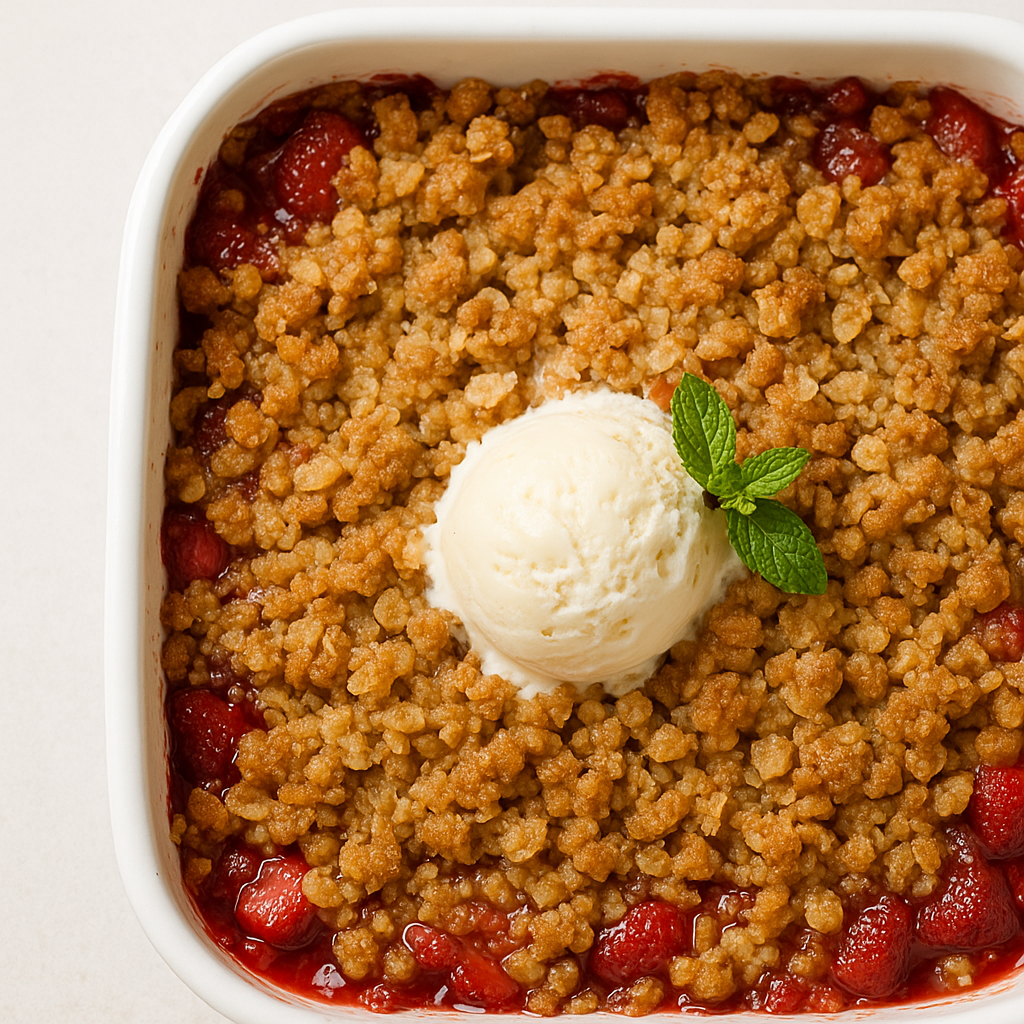
When and How to Grow Peas in Alabama

Planting Peas in Alabama: Timing, Tricks, and a Good Harvest

Peas are one of those crops that make us feel like garden wizards. We drop a few hard little seeds in cool dirt, and a few weeks later we’ve got green vines and sweet pods. It’s simple. It’s hopeful. And in Alabama, it’s all about timing.

Peas are not heat lovers. They don’t “push through” summer. They melt. So we work with our seasons, not against them. Do that, and peas will treat us right.

One quick note before we start: this guide is for cool-season peas—English (garden) peas, snap peas, and snow peas. Not southern peas or cowpeas. Those are a different story and a different season.


The Best Time to Plant Peas in Alabama

In Alabama, peas like the weather we get when we’re still wearing a jacket in the morning but thinking about taking it off by lunch.

Spring planting window

  • Late January to early March is the sweet spot for most of the state.
  • South Alabama can often start earlier.
  • North Alabama may need to wait a bit longer if the ground stays cold.

Pea seeds can sprout in cool soil, but they do better when the soil isn’t icy. If the ground is soggy and cold, seeds may rot before they wake up.

Fall planting window

  • Late August to early September can work for a fall crop.
  • The trick is getting plants established before heat hangs on too long, then letting them set pods as nights cool.

Fall peas are a gamble some years, but they can pay off big if the weather cooperates.

The temperature rule we live by

Peas grow best when temps run 55°F to 70°F. When days start pushing into hot spring weather, peas rush, stress, and fade.

So we plant early enough to get pods before heat shows up like an uninvited guest.


Picking the Right Pea Varieties for Alabama

We want peas that can handle Alabama’s mood swings: chilly starts, wet spells, and a spring that can turn hot fast.

Garden peas (English peas)

These are the classic shelling peas. We eat the peas inside the pod.

  • Good choices: ‘Wando’ (handles warmth better than many), ‘Green Arrow’ (reliable and tasty)

Snap peas

We eat the whole pod. Sweet, crisp, and great right off the vine.

  • Good choice: ‘Sugar Ann’ (early and dependable)

Snow peas

Flat pods we pick before the peas swell. Great for stir-fries and salads.

  • Look for types labeled early or heat-tolerant when possible.

If we’re new to peas, snap peas are often the easiest win. They produce fast, and we don’t have to shell anything. That’s a fine deal.


Soil Prep: What Peas Want Under Their Feet

Peas are polite plants. They don’t demand luxury. But they do need decent soil.

The soil peas like

  • Well-drained (peas hate wet feet)
  • Loamy (crumbly, not brick-hard)
  • pH around 6.0 to 7.5

A simple prep plan

  1. Clear the bed of old roots and weeds.
  2. Mix in compost or well-rotted manure.
  3. Loosen the soil about 6–8 inches deep.
  4. Rake the top smooth so seeds sit at an even depth.

If your soil is heavy clay (hello, Alabama), compost helps a lot. Raised rows help even more. The goal is drainage and air. Roots need both.


How to Plant Peas Step by Step

Peas are easy to plant. The mistake we make is planting too deep or too crowded.

Planting basics

  • Depth: about 1 inch deep
  • Spacing: about 1 inch apart (we can thin later if needed)
  • Row spacing: 18–24 inches apart

After planting, water gently. We want moisture, not a flood.

Should we soak seeds first?

You can, but you don’t have to. Soaking can speed sprouting, but in wet soil it can also invite rot. If the bed is already cool and damp, we skip soaking and let nature do its thing.

Add support early

If we’re growing climbing peas, put in support before the vines get long.

  • Trellis, fence, or stakes work fine.
  • Even short “bush” types do better with a little support in wind and rain.

A good trellis also helps air flow, which matters in our humid springs.


Watering and Feeding Without Overdoing It

Peas like steady moisture, especially when flowering and filling pods.

Watering

  • Aim for about 1 inch of water per week.
  • Water deep, not shallow and daily.
  • Keep soil moist, not swampy.

Mulch helps a lot. Straw, shredded leaves, or pine straw works fine. Mulch keeps the soil cooler, holds moisture, and cuts down weeds.

Fertilizer

Peas are light feeders. In fact, too much nitrogen can make leafy vines and fewer pods.

  • Compost is usually enough.
  • If soil is poor, a small dose of balanced fertilizer (like 10-10-10) can help.
  • Go easy. We’re growing pods, not a vine jungle.

One handy tip: peas make some of their own nitrogen with help from soil bacteria. If peas have struggled in that bed before, using a pea inoculant can help. Not required, but useful.


Common Pea Problems in Alabama (And What We Do)

Alabama gardens can be tough on peas because we get warm days and humid air. That’s a party for pests and fungus.

Pests we may see

  • Aphids: tiny sap-suckers that cluster on tips
  • Slugs: chew holes, mostly at night
  • Pea weevils: can damage pods and seeds

What helps:

  • Spray aphids off with water or use insecticidal soap.
  • Keep beds tidy and use mulch wisely to reduce slug hideouts.
  • Pick pods on time and don’t leave old pods hanging.

Diseases to watch

  • Powdery mildew: white coating on leaves
  • Root rot: from soggy soil

What helps:

  • Plant where air moves (don’t crowd).
  • Use a trellis.
  • Water the soil, not the leaves.
  • Don’t overwater. Drainage is everything.

Harvesting Peas for Best Flavor

Peas reward fast picking. The more we harvest, the more they produce—up to a point.

When to pick

  • Garden peas: pods plump, peas filled out, still sweet
  • Snap peas: pods full and crisp, seeds still small
  • Snow peas: pods flat, before seeds swell

Pick in the morning if you can. Pods are crisp and cool then. Also, try not to “yank.” Hold the vine with one hand and pick with the other. Vines can snap if we get rough.


How to Get More Peas From the Same Space

If we want bigger harvests, we don’t need magic. We need habits.

Succession planting

Plant a small batch every 2–3 weeks during the cool window. That spreads harvest out instead of giving one big flush and then nothing.

Crop rotation

Don’t plant peas in the same spot every season. Rotation helps reduce disease and pest buildup.

Companion planting

Peas play well with:

  • carrots
  • radishes
  • turnips

Avoid planting peas right next to onions and garlic if you can. They tend to stunt each other.

Know when to quit

When warm weather really settles in, peas decline. Don’t fight it. Pull them, compost the vines, and switch to a heat-lover. A good gardener is stubborn, sure—but also practical.


The Simple Pea Plan That Works

If we boil it down, pea success in Alabama is this:

  1. Plant early for spring, and early again for fall if you try it
  2. Use well-drained soil with compost
  3. Give climbing peas a trellis
  4. Water steady, feed light
  5. Harvest on time and keep picking

Peas are a cool-season gift. They show up when the garden is waking up, and they leave before the heat gets rude. That’s fine. We’re not here to force nature. We’re here to eat well.

A Row of Peas Is a Promise

There’s something steadying about peas. They come in a season when we’re itching to plant, but it’s still too early for the summer stuff. They give us something green to tend. Something to look forward to.

And when we finally pop that first sweet pod and taste it right there in the yard—well, that’s the kind of moment that keeps us gardening. Even when it’s humid enough to swim through the air.

When and How to Plant Sweet Potatoes in Alabama

Sweet potatoes fit Alabama like a well-worn glove. They love our long, warm summers. We love how they taste in just about anything—from a weeknight skillet to a holiday casserole that makes folks act like it’s a family heirloom.

But sweet potatoes are also a little picky. Not fussy. Just specific. If we plant too early, they sulk. If the soil stays wet, they rot. If we feed them like tomatoes, they grow a jungle of vines and forget to make the good stuff underground.

Let’s keep it simple and get it right.


Sweet Potatoes vs. “Cool Season” Potatoes

Sweet potatoes are warm-season crops. They want heat. They want long days. They want soil that feels like summer, not spring pretending.

Cool-season potatoes (the Irish potato type) are the opposite. They like cool weather and get grumpy in heat. So when we talk sweet potatoes here, we’re talking planting after frost, in warm soil, for a summer-to-fall harvest.

This blog post is for the warm season type of potatoes. Check out this page for cool season potatoes.


Why We Grow Them (Besides the Taste)

Sweet potatoes pull double duty: they’re tasty and they’re good for you.

They’re packed with vitamin A (that deep orange color is doing work), plus vitamin C and fiber. They’re also steady energy—more “slow burn” than “sugar spike.” That makes them handy for folks who watch their blood sugar.

And in the garden? They’re productive. A small patch can give you a real pile of food, which feels like winning twice.


Best Varieties for Alabama

Alabama is sweet potato country, so we’ve got options. These three are safe bets:

Beauregard

This one is famous for a reason. High yield, good disease resistance, and it handles our heat well. If we had to pick one for a first-timer, this is it.

Jewel

Smooth texture, orange flesh, great baked. It’s the kind of sweet potato that makes you think, “Why don’t we eat this more often?”

Covington

Uniform shape, dependable flavor, and a strong track record in warm regions. It’s a solid choice if you like consistent results.

If you’re buying slips locally, these are also the names you’ll see most often, which makes life easier.


When to Plant Sweet Potatoes in Alabama

Here’s the big rule:

Plant after the last frost and after the soil warms.

In most of Alabama, that lines up around late April through early May. South Alabama can often plant earlier. North Alabama may need to wait a bit longer.

Sweet potatoes really start moving when soil temps stay above 65°F. If we plant into cold ground, slips sit still, roots stall, and growth gets uneven. That sets us back before we even start.

A simple way to time it

  • Wait until nights stay mild
  • Let the soil warm for a week or two after your last frost
  • Use a soil thermometer if you want to be precise

If the soil feels cool on your bare hand in the morning, it’s not time yet.


Soil Prep: How We Set the Table

Sweet potatoes want soil that drains fast and stays loose. Think sandy, crumbly, easy digging.

Aim for:

  • Well-drained soil
  • Slightly acidic pH (about 5.8–6.2)
  • Lots of organic matter
  • Loose texture down 10–12 inches

If your soil is heavy clay (and a lot of Alabama soil is), we can still grow sweet potatoes—but we need to help the soil breathe.

The easiest fix: raised beds or mounds

Raised rows warm faster and drain better. That’s a sweet potato’s love language.

  • Make mounds or beds about 8–12 inches tall
  • Work compost into the top layer
  • Keep it fluffy, not packed tight

Fertilizer: don’t overdo it

Sweet potatoes don’t need rich, high-nitrogen soil. Too much nitrogen makes vines go wild and tubers stay small.

A light, balanced fertilizer at planting is fine. Compost is great. Just don’t dump on heavy nitrogen and expect magic.


Slips: What We Plant and Why

We don’t plant sweet potatoes from “seed” like beans. We plant slips, which are young shoots grown from a sweet potato.

You can:

  • Buy slips (fast, easy, reliable)
  • Grow your own slips (fun, but takes time)

If we grow our own slips

  • Start 6–8 weeks before planting time
  • Keep a sweet potato warm and slightly moist
  • Let sprouts grow to 6–10 inches
  • Twist them off and root them in water or damp mix

Buying slips is often the simplest move, especially if we want good varieties without guessing.


How to Plant Slips the Right Way

This part is simple, but spacing matters.

Planting basics

  • Space slips 12–18 inches apart
  • Rows 3 feet apart
  • Bury the slip deep, leaving only the top leaves above soil
  • Press soil gently around it so the roots touch good dirt

Sweet potato vines like to roam. Give them room, and they’ll repay you.

Traditional rows vs. raised beds

Both work. Raised beds just make things easier:

  • warmer soil sooner
  • better drainage
  • easier digging at harvest

If your garden holds water, raised beds aren’t optional. They’re the difference between “nice harvest” and “sad mush.”


Caring for Sweet Potatoes All Summer

Sweet potatoes are tough once established, but they do best with steady care early on.

Watering

  • Water deeply about once a week
  • Keep soil moist the first few weeks
  • After that, they handle heat better than most crops

Avoid constant soggy soil. That’s when rot shows up.

Feeding

Keep feeding light.

  • A small side-dress of compost mid-season is fine
  • If leaves look too pale, a mild balanced feed helps
  • If vines are huge and tubers are small, we fed too much nitrogen

Weeds

Weeds steal heat and space early on. Weed the first month, then vines will shade the soil and do a lot of the work for you.

Pests to watch in Alabama

  • Sweet potato weevil (a serious one)
  • Wireworms
  • Occasional leaf-eaters

Clean garden habits help a lot:

  • Rotate crops (don’t plant sweet potatoes in the same spot every year)
  • Remove old plant trash
  • Don’t leave damaged tubers in the soil

Harvest Time: When to Dig

Most sweet potatoes are ready 90–120 days after planting. You’ll know you’re close when:

  • vines slow down
  • leaves start yellowing
  • nights begin cooling off

Don’t wait for a hard frost. Cold can damage the roots fast.

How to dig without heartbreak

Sweet potatoes bruise easy. Use a garden fork and start digging well away from the main stem. Loosen soil, then lift carefully.

If we slice them with a shovel, they’ll still taste fine—but they won’t store as long.


Curing and Storage: The Step People Skip (And Regret)

Fresh-dug sweet potatoes aren’t at their best yet. Curing turns starch into sugar and heals small cuts.

Curing basics

  • About 85°F
  • High humidity
  • 7–10 days

A warm garage, shed, or enclosed porch can work if it stays warm. Lay them out in a single layer. Don’t wash them.

Storage after curing

  • Cool, dark, dry place
  • Around 55–60°F is ideal
  • Don’t refrigerate (it hurts flavor and texture)

Stored right, they can last for months. That’s garden gold.


The Patch Plan That Usually Wins

If we want the “easy win” version, here it is:

  1. Plant slips late April to early May (when soil is warm)
  2. Use raised beds or mounds if drainage is iffy
  3. Feed lightly, water weekly early on
  4. Dig before cold nights get serious
  5. Cure, then store cool and dark

Sweet potatoes don’t ask for perfection. They ask for warmth, loose soil, and a little patience.


A Good Harvest Feels Like a Small Miracle

There’s something honest about digging sweet potatoes. You spend all summer looking at vines and guessing. Then one day you lift the soil and—well—there it is. Hidden work. Real food. A quiet payoff.

So let’s plant them when the ground is ready, not when we’re impatient. Let’s keep the soil loose, the water steady, and the fertilizer sensible. Do that, and Alabama will do the rest.

When and How to Plant Corn corn in Alabama

The rhythmic hum of life in Alabama holds a secret that every gardener in the state knows—the timing for planting corn. We’re about to embark on a journey through the heart of Alabama’s fields, where the soil cradles seeds with the promise of golden harvests. Join us as we explore the steps to ensure your corn thrives amid the warm embrace of the Alabama sun.

Alabama’s unique climate, with its hot summers and mild winters, creates an ideal environment for growing corn. The state’s long growing season, stretching from late spring to early fall, provides ample time for corn to mature fully. This climate, however, requires careful consideration of timing to avoid the sweltering heat that can stress young plants.

Selecting the Right Corn Variety

Choosing the right variety is akin to picking the perfect melody for a song. Alabama’s climate favors heat-tolerant varieties:

  • Sweet Corn: For those who cherish sweetness with each bite.
  • Field Corn: Ideal for those focusing on livestock feed or cornmeal.
  • Popcorn: Perfect for those looking to add a bit of magic to movie nights.

When selecting a variety, consider your garden’s microclimate, soil type, and personal preferences. Consult local nurseries or extension services to find varieties proven to flourish in Alabama.

Preparing the Soil

Your soil is the canvas upon which your corn will paint its story. Here’s how to prepare it:

  1. Test Your Soil: Ensure the pH level is between 5.8 and 6.8. Amending your soil with lime can help achieve this balance if needed.
  2. Add Organic Matter: Incorporate compost or well-rotted manure to improve soil structure and fertility.
  3. Till the Soil: Break up any large clods and create a fine, even seedbed to encourage strong root development.

Spacing and Planting Depth

Corn’s growth is a dance, and spacing is the choreography. Plant your seeds:

  • Spacing: 8-12 inches apart within rows and 30-36 inches between rows.
  • Depth: 1-2 inches deep, ensuring good seed-to-soil contact for optimal germination.

Watering and Fertilizing

Corn plants, with their towering stalks, thirst for water and nutrients:

  • Watering: Aim for 1-1.5 inches of water per week, ensuring even moisture throughout the growing season.
  • Fertilizing: Apply a balanced fertilizer at planting. Side-dress with nitrogen-rich fertilizer when plants are about knee-high to support vigorous growth.

Managing Pests and Diseases

Gardening in Alabama means being vigilant against common pests and diseases:

  • Pests: Look out for corn earworms, cutworms, and aphids. Use organic insecticides or introduce beneficial insects like ladybugs.
  • Diseases: Watch for signs of rust, blight, and smut. Rotate crops annually and ensure good air circulation to minimize risks.

Harvesting Your Corn

The culmination of your efforts arrives when the corn is ready for harvest:

  • Signs of Readiness: The silks will turn brown, and the kernels will be plump and milky when pierced.
  • Harvesting: Firmly grip the ear, twist it downward, and pull it away from the stalk.

Growing corn in Alabama is more than just planting seeds; it’s a tender dance with nature, a reflection of your care and dedication. As you tend to your garden, remember that each step is a chapter in a story, culminating in the golden joy of a bountiful harvest. Embrace the journey, and may your cornfields thrive under the glorious Alabama sun.

Alabama Home Gardening

Gardening enthusiasts in Alabama are blessed with a diverse climate and rich soil that offer unique opportunities for home gardening. Whether you are a seasoned gardener or a beginner, the combination of Alabama’s natural beauty and its supportive gardening community makes it an ideal place to grow your own garden oasis.

The Allure of Home Gardening in Alabama

Home gardening in Alabama is more than just a leisure activity; it’s a lifestyle that brings families and communities together. The state’s mild winters and hot summers provide a varied growing season that allows for a wide range of plants, vegetables, and flowers to thrive. The impact of home gardening extends beyond personal satisfaction, contributing positively to local communities by promoting sustainability and self-reliance.

Seasonal Gardening Tips

Understanding the seasonal nuances of Alabama’s climate is key to successful gardening. Here’s a comprehensive guide on what to plant and when:

Spring

Spring in Alabama is a season of renewal and growth. Ideal for planting:

  • Vegetables: Tomatoes, peppers, cucumbers, and squash.
  • Flowers: Marigolds, petunias, and zinnias.
  • Herbs: Basil, cilantro, and parsley.

Summer

Summer gardening can be challenging due to the intense heat, but it’s also the time for harvesting:

  • Vegetables: Okra, eggplant, and sweet potatoes.
  • Flowers: Sunflowers, hibiscus, and periwinkle.
  • Herbs: Oregano, thyme, and rosemary.

Fall

Fall offers a second chance for planting cool-season crops:

  • Vegetables: Broccoli, kale, radishes, and lettuce.
  • Flowers: Mums, pansies, and asters.
  • Herbs: Chives and sage.

Winter

While winter is milder in Alabama, it’s still a good time for certain activities:

  • Vegetables: Garlic and onions.
  • Flowers: Camellias and hellebores.
  • Herbs: Indoor herb gardens flourish well during this time.

Sustainable Practices in Alabama Gardening

Sustainability is becoming increasingly important in the gardening community. Here are some eco-friendly practices that are gaining traction in Alabama:

  • Composting: Creating nutrient-rich compost from kitchen waste helps improve soil fertility.
  • Rainwater Harvesting: Collecting rainwater reduces dependence on municipal water supplies and is excellent for plants.
  • Native Plants: Growing native plants like Alabama azaleas and oakleaf hydrangeas conserves water and supports local wildlife.
  • Organic Methods: Using organic fertilizers and pesticides reduces chemical runoff and promotes a healthier garden ecosystem.

Community Spotlight: Alabama Gardening Groups and Events

Alabama is home to a vibrant gardening community with numerous groups and events that bring people together:

  • Alabama Master Gardeners Association: Offers training programs and volunteer opportunities for gardening enthusiasts.
  • Local Farmers’ Markets: Places like the Pepper Place Market in Birmingham provide a venue for gardeners to sell their produce and connect with others.
  • Gardening Workshops: Held throughout the state, these workshops offer practical advice and hands-on experience.
  • Garden Tours: Events like the Alabama Garden Tour showcase beautiful home gardens and provide inspiration.

Benefits of Gardening for Mental and Physical Health

Gardening is not only a fulfilling hobby but also has numerous health benefits:

  • Mental Health: Gardening reduces stress, anxiety, and depression by promoting mindfulness and offering a sense of accomplishment.
  • Physical Health: Activities like digging, planting, and weeding provide moderate physical exercise, improving cardiovascular health and flexibility.
  • Nutritional Benefits: Growing your own fruits and vegetables ensures access to fresh and organic produce, contributing to a healthier diet.

Practical Advice for Beginners

Starting a garden from scratch can be daunting, especially in Alabama’s unique climate and soil conditions. Here are some tips to help you get started:

  • Soil Testing: Conduct a soil test to determine its pH and nutrient levels, which will guide your fertilization strategy.
  • Raised Beds: Consider using raised beds to better control soil quality and drainage.
  • Crop Rotation: Practice crop rotation to prevent soil depletion and reduce pest problems.
  • Watering: Water deeply and infrequently to encourage strong root growth. Early morning watering reduces evaporation.
  • Mulching: Use mulch to retain soil moisture, suppress weeds, and regulate soil temperature.

Home gardening in Alabama offers a rewarding experience that combines beauty, sustainability, and community spirit. By following seasonal tips, practicing sustainable methods, and engaging with local gardening groups, you can create a thriving garden that brings joy and health benefits to your life. Whether you’re a novice or a seasoned pro, the unique climate and rich culture of Alabama provide the perfect backdrop for your gardening journey.

When to Plant Spinach in Alabama

The Best Time to Plant Spinach in Alabama

Spinach is one of those crops that makes us feel smart. It grows fast, packs a punch at the dinner table, and doesn’t ask for much—just cool weather and steady care. In Alabama, that “cool weather” part is the whole game.

Spinach is not a summer plant here. Our heat makes it bolt, turn bitter, and quit early. But in fall, winter, and early spring? Spinach can be a star. If we plant it at the right time, we can pick fresh leaves for months.

Let’s walk through when to plant spinach in Alabama, what it likes, and how to keep it happy when the weather swings.


Why Spinach Loves Alabama… in the Right Season

Spinach is a cool-season green. Think of it like a guest who enjoys a quiet porch and a mild breeze. When it’s calm outside, it thrives. When it’s blazing hot, it packs up and leaves.

In Alabama, we get two windows where spinach can shine:

  • Fall planting for harvest through winter
  • Late winter/early spring planting for a spring harvest before heat hits

If we treat spinach like a summer crop, it will punish us with bitterness and flower stalks. If we treat it like a cool-season crop, it will reward us with tender leaves.


Ideal Growing Conditions for Spinach in Alabama

Spinach grows best when we give it a few basics.

Temperature

Spinach likes it cool:

  • Best growth is often around 55°F to 65°F
  • It can handle cooler temps, especially once established
  • Heat pushes it to bolt (flower) and turn bitter

Soil

Spinach wants soil that is:

  • Moist but well-drained
  • Rich in organic matter
  • pH around 6.0 to 7.5

Spinach roots are shallow, so soil that stays evenly moist is key. But soggy soil causes rot. That’s the tightrope.

Sunlight

Spinach grows fine in:

  • Full sun in winter
  • Partial shade in warmer stretches

In spring, a little afternoon shade can buy us more harvest time before the heat ramps up.

Water

Spinach likes steady moisture. Not a flood. Not a drought. Just steady.

A good target is about 1 inch of water per week, more if it’s dry and windy.


The Best Time to Plant Spinach in Alabama

Now the big question: when do we plant?

Fall planting: the best window for most gardeners

This is the easiest time to grow spinach in Alabama.

  • Plant September through November, depending on where you are in the state.
  • The goal is to get plants established while soil is still warm, then let them cruise through cool weather.

Fall spinach tends to be sweeter, slower-growing, and longer-lasting.

Late winter to early spring planting: the backup window

If you missed fall, you can still grow a strong spring crop.

  • Plant January through early March
  • Spinach will grow fast as days lengthen, but you must beat the heat

Once warm spring weather settles in, spinach bolts quickly.

A simple rule we can trust

Plant spinach when:

  • Days are cool
  • Nights are chilly
  • The soil is workable and not mud

If we’re already thinking about shorts and mosquitoes, we’re late.


Choosing the Right Spinach Variety for Alabama

Variety matters because Alabama weather can turn on a dime.

Here are common types you’ll see, and how they behave.

Bloomsdale (Savoy type)

This is the classic crinkly-leaf spinach. Great flavor, good cold tolerance, and a strong fall choice. It can handle cool conditions well, especially with light protection.

Savoy types (in general)

Savoy spinach is usually more cold-tolerant and sturdy. It’s a good fall and winter pick.

American spinach types

Often chosen because they handle a wider range of temps. These can be a good “workhorse” choice when weather is unpredictable.

Tyee

Known for big leaves and good yield, but it often needs steady water and can be less forgiving if conditions swing dry or hot.

Space Spinach

A hardy type that can do well in cooler conditions and can be a solid option in the shoulder seasons.

Best approach: plant two varieties. One sturdy, one fast. That way you’re not betting the whole harvest on one personality.

Also, your county extension office often has the best local advice on what performs well in your exact area.


How to Plant Spinach for Best Results

Spinach is easy to plant, but spacing and timing make it better.

Planting basics

  • Sow seeds about ½ inch to 1 inch deep
  • Space seeds about 1 inch apart, then thin later
  • Rows can be 12–18 inches apart, or use wide beds

Once seedlings have a couple true leaves, thin them to:

  • 3–5 inches apart for baby leaf harvest
  • 6 inches apart for larger plants

Succession planting

If we want spinach for weeks instead of one big flush, plant in rounds:

  • sow a small patch every 10–14 days during the cool window

That’s how we keep steady harvests without panic.


Care and Maintenance Tips for Alabama Spinach

Spinach isn’t hard, but it does like attention.

Watering

  • Water deeply about once a week
  • More often in sandy soil or windy weather
  • Try to water at the soil level, not over the leaves

Wet leaves plus Alabama humidity can invite problems.

Feeding

Spinach likes fertile soil.

  • Work compost in before planting
  • If needed, feed lightly every 4–6 weeks with a balanced fertilizer like 10-10-10
  • Don’t overdo it—too much can cause soft growth and more disease trouble

Mulching

Mulch is spinach insurance.

  • It holds moisture
  • Stops weeds
  • Buffers cold snaps
  • Keeps soil temps steady

Use straw, shredded leaves, or fine mulch about 2 inches deep once seedlings are established.


Common Problems With Spinach in Alabama

We’ve got two main enemies: pests and moisture issues.

Pests to watch

  • Aphids
  • Flea beetles
  • Slugs
  • Cutworms
  • Leaf miners

Good habits help a lot:

  • keep beds clean
  • rotate crops
  • use row cover early if pests are bad
  • try insecticidal soap for aphids before anything stronger

Diseases

  • Powdery mildew
  • Root rot

Prevention is the real cure:

  • don’t overcrowd plants
  • keep air moving
  • avoid waterlogged soil
  • water the ground, not the leaves

Frost Protection Strategies That Work

Spinach can handle cold, but sudden hard freezes can still damage young plants.

Row covers

Light fabric row covers are one of the best tools you can own.

  • They trap warmth
  • Block wind
  • Protect from frost
  • Can raise temps several degrees around the plants

Mulch

Mulch acts like a blanket for the soil. It keeps roots safer and reduces stress.

Raised beds

Raised beds warm faster and drain better. They also help reduce winter sogginess, which is a sneaky spinach killer.

Sheltered spots

If you’re growing in containers or small beds, place spinach near a wall or protected area. Walls release a little warmth at night and block wind.


Harvesting Spinach the Right Way

Spinach is usually ready in about 40–50 days, often sooner for baby leaves.

Two easy harvest methods

  • Cut-and-come-again: snip outer leaves and let the center keep growing
  • Whole plant harvest: cut the plant at the base when it’s full size

For the best flavor:

  • harvest in cool weather
  • pick in the morning
  • don’t wait until leaves get old and tough

The Spinach Schedule That Usually Wins in Alabama

If we want a simple plan that works most years:

  • Plant fall spinach: September–November
  • Plant spring spinach: January–early March
  • Succession sow: every 10–14 days during cool weather
  • Use mulch + row cover: for steadier temps and fewer problems
  • Harvest often: young leaves taste best

Spinach is one of the best “value crops” we can grow. It’s fast, healthy, and generous—if we plant it when Alabama is cool enough to be kind.

And October through early spring? That’s Alabama being kind.

When to plant turnips in Alabama

When to plant turnips in Alabama

Turnips are an often underrated vegetable that can be a delicious and nutritious addition to any garden. Whether you’re growing them for the first time or have been cultivating them for years, understanding when to plant turnips in Alabama is essential for successful harvesting. This article will explain the necessary steps for growing turnips in Alabama. With the right conditions, turnips can be a tasty addition to your home-grown vegetables!

Many try to grow turnips during the Summer, but we would advise against it due to high temperatures and pest pressure. Just feeding worms during the Summer!

What are Turnips

Turnips are a root vegetable with a unique sweet and earthy flavor. When eaten raw, they have a crisp texture; when cooked, they become soft and tender. This makes them ideal for various dishes, such as roasting, boiling, or braising.

Nutritionally speaking, turnips offer many benefits. They are high in vitamin C, fiber, and potassium while still low in calories and fat. These nutrients help improve the health of all body systems, including the digestive and immune systems. Additionally, turnips are rich in antioxidant compounds, which can protect cells from damage caused by free radicals.

Turnip greens can also be harvested during the season before roots are harvested. Their leaves can also be consumed as a nutritious green vegetable! The leaves are packed with essential vitamins A and K and minerals like calcium and iron. They also contain beneficial phytochemicals that may have anti-inflammatory properties, which could be helpful to overall health.

Turnips are an incredibly versatile fall vegetable that can easily fit into any diet due to its delicious taste and impressive nutritional profile! From salads to soups to side dishes – there’s no limit to how you can enjoy this delicious root vegetable!

when to plant turnips in alabama

Climate and soil requirements for growing turnips in Alabama

Growing turnips in Alabama requires a particular climate and soil type for success. The ideal climate for turnips is cool, with mild temperatures that don’t dip below freezing or rise above 80°F. Turnips also require light, well-drained soil with a pH between 5.5 and 6.5. Plant them in an area with at least six hours of sunlight daily. Choose an early spring or late fall time when temperatures are milder, and there is less risk of drought or frost damage.

To prepare the garden bed for planting, weed and break up large clumps of soil before adding compost or manure. Turnips should be planted about one inch deep in the soil, four inches apart. Plant and water them regularly until they’re ready to be harvested, about two months later.

Be mindful of pests and diseases that can damage turnips and Blackleg, which can cause rotting roots and stunted growth. To prevent problems, always plant different vegetables in different parts of your garden every year. Also, check your plants often for signs of pests or diseases.

Follow these guidelines to grow turnips in Alabama, which are delicious and nutritious! With the right conditions, turnips can be a delightful addition to your garden while providing essential vitamins and minerals with few calories.

Planting the seeds and caring for your turnip crop

Growing turnips in Alabama is a rewarding experience, but it requires careful preparation. Planting the seeds at the right time and in the ideal conditions is essential for a successful harvest. The optimal season to sow turnip seeds is late summer or early fall when temperatures stay mild, and soil temperatures range between 65-70°F. To plant, use a hoe or trowel to make rows 2 inches deep and 6 inches apart. Then, once the seedlings reach 4-6 inches tall, thin them out so the plants are spaced 4-6 inches apart.

Caring for your turnips during their growth period is equally important. Keep the soil moist by watering regularly, yet be sure not to overwater, as this could lead to root rot. Fertilize with a balanced fertilizer every few weeks and spread mulch around your plants to help keep moisture and discourage weeds. Pests and diseases can harm plants, so be careful. Look for holes in leaves or stems, wilting, discoloration, and spots on foliage. These may need treatment with organic methods like neem oil or insecticidal soap. Remove any diseased plants from the garden right away.

With these planting and care tips followed correctly in Alabama, you can look forward to harvesting nutrient-rich turnips throughout the season!

Harvesting and storing turnips from your garden

Harvesting and storing turnips from your garden is essential to enjoying this delicious and nutritious vegetable. When the root has reached a diameter of 2-3 inches, it is time to harvest. To ensure you have maximum flavor, try to pick your turnips as soon as they are mature.

The tops can be cut off for turnip greens, which some say taste better after a light frost. This helps to sweeten the leaves and reduce their bitterness. If you want to use the greens, keep at least two inches of stem attached when harvesting the root.

Turnip roots should be stored in a dry, cool place such as a root cellar or refrigerator and can last up to 3 months under ideal conditions. Keep them fresh by brushing or washing with cold water. Then, store them in airtight containers or plastic bags in the refrigerator crisper.

While storing turnips, check for wilted foliage, soft spots on the root, or slime on its surface. These are signs that turnips aren’t good to eat anymore.

If you use these guidelines for harvesting and keeping turnips from your Alabama garden, you can have the pleasure of consuming this delicious vegetable all season!

Common pests, diseases, and other challenges to growing turnips in Alabama

Growers must know potential problems with turnips in Alabama, such as pests, diseases, and challenges. Flea beetles are the most common pest in the area and can cause extensive damage to the leaves if not controlled. Southern blight is a fungal disease that can occur in warm and wet conditions, so proper ventilation and monitoring are vital to preventing its spread. It should also be treated with fungicides as soon as signs of infection are noticed.

Cold temperatures can kill turnip crops. To make sure they don’t die, plant them when the soil is between 45–75°F. Regular maintenance issues, like over- or under-watering, can lead to stunted growth, leaf damage, disease, and other problems. It would be best to ensure plants get enough water without becoming waterlogged. Rotation of crops every two to three years will also help reduce disease risk.

Weeds compete with your turnips for nutrients. Hoeing or hand-weeding around each plant will help provide optimal growth. Additionally, regular inspection for pests or signs of disease development is essential–if an infestation occurs, you should act quickly before it spreads further. Finally, organic fertilizers such as compost or manure may improve yields and avoid harsh chemicals that could harm beneficial insects or pollinators.

With proper care and attention, turnips have the potential to become a delicious and nutritious addition to your garden in Alabama! By taking preventive measures, like crop rotation and regular inspections, you can maximize their yield and avoid potential problems.

Alabama Planting and Gardening Zones

Alabama Planting and Gardening Zones

Gardening in Alabama presents diverse opportunities due to its varied climate and long growing season. What planting zone is Alabama? Alabama is primarily classified within USDA Hardiness Zones 7-8, which means it experiences a relatively mild winter, allowing a wide variety of plants to be grown. Here are some key considerations and tips for gardening in the state:

Climate and Seasons

  • Spring: Alabama springs can be wet, with occasional late frosts. It’s essential to wait until after the last frost date before planting tender annuals and vegetables.
  • Summer: Summers can be hot and humid, challenging for gardeners and plants. Plants that can tolerate high humidity and heat will do best.
  • Fall: Fall in Alabama can provide a second growing season for many vegetables. It’s also a good time for planting trees and shrubs as they can establish roots without the stress of summer heat.
  • Winter: Winters are mild, but occasional freezes can happen. Gardeners can often grow cool-season crops throughout much of the winter – pansiesviolas, and kale.

USDA Hardiness Zones in Alabama

Zone 8b covers most of the Gulf Coast and south-central Alabama gardening zone. It is characterized by hot summers with temperatures as high as 96°F and mild winters with temperatures typically above 15°F. This region experiences a relatively short but intense growing season due to Summer heat.

Zone 8a extends northward from zone 8b towards central Alabama. Temperatures here are slightly cooler than in zone 8b, with summer highs averaging around 94°F and winter lows dipping to 10°F. Summers can be scorching, with no wind, dry, and high humidity simultaneously.

Moving north into zone 7b, we find ourselves near Birmingham and other parts of northern Alabama. This region has longer summers than those located further south; while hot (average highs reach 90°F), they tend to last longer due to milder winters (average lows stay above 5°F). Since this area can experience cold snaps and heat waves during any given season, gardeners here must choose their crops wisely; root vegetables such as carrots do well here, while more delicate fruits like peaches may struggle during periods of extreme weather.

Finally, heading up into northeast Alabama brings us into zone 7a, which covers mountainous regions near Huntsville to Mentone. Here, temperatures average around 87 °F during summer, while winter lows can drop below 0 °F. One of the few areas where peonies thrive is Alabama, known for its tolerance to colder climates.

alabama gardening zone

First and Last Frost Dates in Alabama

In Alabama, the frost date can vary greatly depending on the location. Most of the state’s first and last frost dates occur in late February, early March, or early November. While this is a general overview of when to expect temperatures to dip below freezing, it is essential to pay attention to local weather conditions and be aware that temperatures may drop earlier or later than predicted, depending on your location.

The USDA Plant Hardiness Zone Map can help gardeners and growers determine which plants are likely to thrive in their area. In Alabama, there are six hardiness zones ranging from 7a, which has an average annual minimum temperature of 0°F, to 8b with an average annual minimum temperature of 15°F. Knowing the hardiness zone will tell you which plants will survive in your area and when the best time to plant them is.

It’s also important to take note of the first and last frost dates within each hardiness zone, as these will give you a better idea of when it’s safe to plant without worrying about late frosts damaging tender vegetation. Generally speaking, areas in zone 7a should expect their first frost in October, while regions within zone 8b should anticipate their first frost in late November. The last frost date for all zones generally falls within March; however, this may vary slightly from year to year, depending on weather conditions.

Knowing when to expect temperatures to dip below freezing is essential for gardeners who want successful yields in Alabama, as planting too early could result in damaged crops due to late frosts while planting too late could mean missing out on a larger harvest due to a shortened growing season due to Summer heat. By taking into account the Alabama planting zones and local weather forecasts, gardeners can ensure they get off on the right foot when planning their gardens this Spring!

Resources

  • The Alabama Cooperative Extension System is a valuable resource for local gardeners. They offer planting guides, pest management tips, and soil testing services.
  • Local gardening clubs and plant societies can provide community support and region-specific advice.

Gardening in Alabama planting zones can be advantageous. With its long growing season, gardeners can enjoy a multitude of plants and continuously harvest vegetables nearly year-round. Always pay attention to local microclimates and weather patterns, as these can differ even within small geographic areas.

Echinacea Coneflowers in Alabama

Echinacea Coneflowers in Alabama

Echinacea, commonly known as coneflower, is a genus of herbaceous flowering plants in the daisy family. It is native to eastern and central North America, where it is found growing in moist to dry prairies and open wooded areas. They have large, showy heads of composite flowers, blooming from early to late summer. The genus Echinacea derives from the Greek word ‘echino,’ meaning sea urchin or hedgehog, referring to the spiky appearance and feel of the flower heads.

There are around nine species of Echinacea, but the most commonly known and used are Echinacea purpurea (Purple Coneflower), Echinacea angustifolia (Narrow-leaf Coneflower), and Echinacea pallida (Pale Purple Coneflower).

Echinacea plants are well known for their medicinal properties, and they have been used for centuries by Native Americans for treating various ailments. Echinacea is believed to boost the immune system, and today, it is commonly used to prevent and treat colds, flu, and other infections. However, scientific studies on the effectiveness of Echinacea as a treatment for colds, flu, or other infections have produced mixed results. Some studies show some benefits, while others show no effect. Therefore, it’s recommended to consult with a healthcare professional before using Echinacea or any other herbal supplement.

pink and white flower in tilt shift lens

How to Grow

Growing Echinacea (Coneflowers) is relatively easy as they are hardy and drought-tolerant. Here are some steps and tips for growing Echinacea:

  1. Choose the Right Variety: There are several species and varieties of Echinacea, each with unique characteristics. The most commonly grown is Echinacea purpurea, but there are many other beautiful and valuable varieties to consider.
  2.  Planting Seeds or Seedlings: You can start Echinacea from seeds or purchase young plants from a nursery. If starting from seeds, you can sow them indoors 8-10 weeks before the last expected frost or directly outdoors in spring or fall. If you are planting seedlings, it’s best to plant them in the spring or fall.
  3.  Select the Right Spot: Echinacea prefers full sun but can tolerate partial shade. Ensure the planting site receives at least 4-6 hours of sunlight daily.
  4.  Prepare the Soil: Echinacea prefers well-draining soil with a pH between 6.0 and 7.0. It’s not very particular about soil fertility, but adding some compost to the planting hole can help get the plants off to a good start.
  5.  Planting: Plant the seeds or seedlings about 1-3 feet apart, depending on the variety. Cover the seeds with about 1/4 inch of soil and water them well. If planting seedlings, dig a hole large enough to accommodate the root ball and plant at the same depth it grew in its container.
  6.  Watering: Water the plants regularly until they are established. Once established, Echinacea is relatively drought-tolerant, so you only need to water during prolonged dry spells.
  7.  Maintenance: Echinacea requires very little maintenance. You can deadhead the flowers to encourage more blooms, but it’s unnecessary. Leaving the flowers on the plant can provide food for birds during the winter.
  8.  Fertilizing: Echinacea only requires a little fertilizer. You can apply a balanced, slow-release fertilizer in the spring if desired.
  9.  Mulching: Applying a layer of mulch around the base of the plants can help retain moisture and suppress weeds.
  10.  Dividing: Echinacea plants can be divided every 3-4 years in the spring or fall if they become overcrowded.

Remember, Echinacea is a perennial that will come back year after year. It’s also an excellent plant for attracting butterflies and bees to your garden!

Medicinal Uses

Echinacea has been used for centuries for its medicinal properties, and it is one of the most popular herbal supplements in the United States and Europe. Here are some common medical uses of Echinacea:

  1. Immune System Support: Echinacea is most commonly used to boost the immune system. It is believed to stimulate the body’s immune response by increasing the production of white blood cells and activating macrophages and natural killer cells.
  2.  Cold and Flu: Many people take Echinacea at the first sign of a cold or flu to reduce the severity and duration of symptoms. However, research on the effectiveness of Echinacea for preventing or treating colds and flu has produced mixed results. Some studies have found that it can reduce the risk of catching a cold or may help reduce the duration and severity of cold symptoms, while others have found no benefit.
  3.  Respiratory Infections: Echinacea is also used to treat other respiratory infections, such as bronchitis and sinusitis.
  4.  Wound Healing: Echinacea has anti-inflammatory and antimicrobial properties, and it has been used topically to help heal wounds, skin infections, and other skin conditions, such as eczema and psoriasis.
  5.  Urinary Tract Infections: Echinacea is sometimes a natural remedy for urinary tract infections (UTIs).
  6.  Pain Relief: Echinacea has been used traditionally to relieve pain associated with headaches, toothaches, and sore throat.
  7.  Anti-inflammatory: Echinacea has anti-inflammatory properties, which may help reduce inflammation and swelling.
  8.  Antioxidant Properties: Echinacea contains compounds with antioxidant properties, which may help protect the body’s cells from damage caused by free radicals.
  9.  Antiviral and Antibacterial Properties: Echinacea has antiviral and antibacterial properties, which may help fight off infections.

It’s important to note that while Echinacea is generally considered safe for short-term use, it can cause side effects in some people, such as nausea, dizziness, and rash. It may also interact with certain medications or other herbal supplements. Therefore, it’s always recommended to consult with a healthcare professional before using Echinacea or any other herbal supplement, especially if you are pregnant, breastfeeding, have an autoimmune disorder, or are taking other medications or supplements.

What to Plant in March in Alabama

What to Plant in March in Alabama

What to Plant in March in Alabama

If you’re like me, you’re anxiously waiting for spring to arrive. The daffodils are starting to peek up through the soil, and the trees are beginning to bud. But even though it’s still chilly outside, that doesn’t mean you can’t start planting in your garden! In this blog post, we will discuss what plants do well in March in Alabama. We’ll also give you a few tips on how to care for them. So if you’re ready to get your hands dirty, keep reading!

One of the most important things to remember when planting in Alabama is that it is still possible for frost to occur. So, you’ll want to wait to plant anything that is sensitive to cold until the danger of frost has passed. That being said, there are still plenty of plants that will do well in cooler weather. Here are a few of our favorites:

Vegetables

Lettuce: Lettuce is a cool weather crop that does well in Alabama. It can be planted as early as February and will continue to produce until the weather gets too hot. Just be sure to keep an eye on the temperatures and protect your plants if there is a chance of frost.

Spinach: Spinach is another cool weather crop that can be planted in February or March. It will continue to produce until the weather gets too hot. Just like lettuce, you’ll want to keep an eye on the temperatures and protect your plants if there is a chance of frost.

Radishes: Radishes are a great crop to plant in March. They do well in cool weather and can be harvested just a few weeks after planting.

Carrots: Carrots are another great option for March planting. They take a little longer to mature than other cool weather crops, but they are well worth the wait!

Flowers

Petunia: Petunias will tolerate cold weather and a light frost. They should be kept dry and avoid water sitting on the foliage.

Calibrachoa: Calibrachoa (ka·luh·bruh·kow·uh) will tolerate cold weather and a light frost. They should be kept dry and avoid water sitting on the foliage.

Now that you know what to plant in March, let’s talk about how to care for your new plants. One of the most important things to remember is to not over water during cold periods. Alabama can be quite wet in early Spring, so make sure to give your plants enough water to stay healthy but not too much. Also, be sure to fertilize them every few weeks. This will help them grow strong and produce lots of flowers or vegetables!

So what are you waiting for? Get out there and start planting! Your garden will thank you for it.

Gardening with Spring Annuals in Alabama

Gardening with Spring Annuals in Alabama

Planting annual plants is a great way to bring color and vibrancy to your garden. But heading to the garden center can be a daunting experience. With so many types of plants, it takes time to know which ones are right for you and your needs. Whether you are a beginner or an experienced gardener, here is a guide to help you choose the best plants at your garden center.

The first step in choosing the best plants is knowing what climate zone your home is located in. Northern Alabama is zone 7, and Southern Alabama is zone 8, with parts of Mobile and Baldwin counties in zone 9. Different climates have different temperatures and moisture levels that affect how well certain plants will grow.

Gardening with Spring Annuals in Alabama

Shopping for the Right Plant

Once you know which type of plants are suitable for your climate, it’s time to start looking for healthy specimens at the garden center. When selecting a plant, check if it has healthy white roots and robust foliage growth; avoid plants with yellowing leaves or wilting stems, as they may already be diseased or stressed. Also, look for signs that pests may be infesting the plant.

Before bringing any plant home, it’s essential to understand its specific requirements to provide proper care once planted in your garden. For example, some plants require full sun while others prefer shade; some need more water than others while some tolerate drought better than most; some need regular fertilizing while others don’t require any additional nutrients at all—these are all factors that should be taken into consideration when selecting a plant from the garden center. Researching or talking with garden center staff will ensure you choose only those plants that fit your existing landscape and match your gardening style and skill level.

To Bloom or Not to Bloom is the Question

If you’ve ever gone to the nursery or garden center and seen the lush, vibrant blooms of plants that have already begun flowering, you may be tempted to buy those immediately. After all, who wouldn’t want a beautiful garden full of color? However, marketing has created a myth that blooming plants are better than plants that still need to bloom. And it couldn’t be further from the truth! Plants that have yet to begin blooming are better able to handle the stress of transplanting.

When you transplant a plant, it experiences physiological stress—it essentially goes into shock as it adjusts to its new environment. When a plant is experiencing stress, it takes energy away from processes like rooting, foliage growth, flowering, or fruit production. That means if you transplant a blooming plant, less energy will be available for root and foliage growth because so much was used to produce flowers. On the other hand, if you transplant a non-blooming plant, more of its energy can go into rooting and foliage growth before producing flowers.

Plants not yet in bloom offer numerous advantages over blooming plants when it comes to successful gardens—from less stress due to an abundance of energy available for root and foliage growth after transplanting to improved success rates due to reduced disease issues from stress. So next time you head out shopping for your garden or landscaping project, remember that although those beautiful blooms may look enticing, non-blooming plants can provide even greater success and blooming rewards down the road!

Adding Compost and Fertilizer to Improve Soil Quality

Have you ever noticed that some gardens are lush and vibrant while others look like barren wastelands? The difference is often due to the soil quality. Poor soil can lead to unhealthy plants, low yields, and discolored foliage. Fortunately, there’s an easy fix: composting or adding fertilizer. Let’s explore how these two methods can help improve your soil!

Composting breaks down organic matter, such as leaves and kitchen scraps, into a nutrient-rich soil amendment. It’s easy to add beneficial bacteria and nutrients to your garden without spending money on costly fertilizers or additives. Compost also helps improve the structure of your soil by increasing its water-holding capacity. Not only will this make your plants healthier, but it will also help reduce water waste! Additionally, composting is incredibly easy—all you need is a large container (or even just a pile) and some kitchen scraps or yard clippings.

Fertilizer is another excellent way to amend your soil. Unlike composting, which relies on bacteria and fungi to break down materials over time, fertilizer directly adds nutrients to the soil through nitrogen, phosphorus, potassium, and other micronutrients. Applying fertilizer regularly can provide a quick boost of nutrition for your plants and encourage growth. However, it’s important not to overdo it; too much fertilizer can burn plants or cause them to become leggy due to excessive phosphorus levels.

Whether you choose composting or fertilizing (or both!), improving the quality of your soil with either method will result in healthier plants that yield greater harvests than before. By taking the time to amend your soil now with either compost or fertilizer, you’ll enjoy a more bountiful garden for years to come! Whether you’re a beginner gardener looking for tips on getting started or an experienced green thumb looking for ways to optimize your current gardening efforts, adding compost or fertilizer should be high on the list of things you do!

Deadhead Flowers for Continuous Blooms

Did you know deadheading flowers can help keep your garden healthy and vibrant? Deadheading is the process of removing spent blooms from plants to encourage new growth. It’s an essential yet simple gardening task that can significantly impact your garden’s appearance.

Deadheading flowers can help promote new growth, create fuller plants with more blooms, and improve overall plant health. When you deadhead a flower, it redirects nutrients back into the plant instead of allowing them to be used in the development of seeds. This means that energy is directed towards creating more blooms and foliage. Additionally, by removing spent flowers, you are reducing the chances of disease.

Start by snipping off any wilted or brown flowers near the base of the flower with sharp scissors or pruners. Be sure to cut only a little into unopened buds, or plant stems. Once all the old flowers have been removed, take a few steps back and check if any more faded blooms need removing before moving on to another plant in your garden!

Deadheading spent flowers is essential for keeping your garden looking vibrant and healthy throughout the growing season. By removing spent blossoms from plants as soon as they begin to fade, you can promote new growth and enjoy longer-lasting blooms in your garden!

Following these tips can help ensure your spring annuals have the best chance for survival and can put on a show all season long!