Echinacea Coneflowers

Echinacea Coneflowers

Echinacea, commonly known as coneflower, is a genus of herbaceous flowering plants in the daisy family. It is native to eastern and central North America, where it is found growing in moist to dry prairies and open wooded areas. They have large, showy heads of composite flowers, blooming from early to late summer. The genus name Echinacea derives from the Greek word ‘echino’, meaning sea urchin or hedgehog, referring to the spiky appearance and feel of the flower heads.

There are around 9 species of Echinacea, but the most commonly known and used are Echinacea purpurea (Purple Coneflower), Echinacea angustifolia (Narrow-leaf Coneflower), and Echinacea pallida (Pale Purple Coneflower).

Echinacea plants are well known for their medicinal properties, and they have been used for centuries by Native Americans for treating a variety of ailments. Echinacea is believed to boost the immune system, and today, it is commonly used to prevent and treat colds, flu, and other infections. However, scientific studies on the effectiveness of echinacea as a treatment for colds, flu, or other infections have produced mixed results. Some studies show some benefits, while others show no effect. Therefore, it’s recommended to consult with a healthcare professional before using echinacea or any other herbal supplement.

How to Grow

pink and white flower in tilt shift lens

Growing Echinacea (Coneflowers) is relatively easy as they are hardy and drought-tolerant. Here are some steps and tips for growing Echinacea:

  1. Choose the Right Variety: There are several different species and varieties of Echinacea, each with its own unique characteristics. The most commonly grown is Echinacea purpurea, but there are many other beautiful and useful varieties to consider.
  2. Planting Seeds or Seedlings: You can start Echinacea from seeds or purchase young plants from a nursery. If starting from seeds, you can sow them indoors 8-10 weeks before the last expected frost or directly outdoors in spring or fall. If you are planting seedlings, it’s best to plant them in the spring or fall.
  3. Select the Right Spot: Echinacea prefers full sun, but it can also tolerate partial shade. Make sure the planting site receives at least 4-6 hours of sunlight each day.
  4. Prepare the Soil: Echinacea prefers well-draining soil with a pH between 6.0 and 7.0. It’s not very particular about soil fertility, but adding some compost to the planting hole can help get the plants off to a good start.
  5. Planting: Plant the seeds or seedlings about 1-3 feet apart, depending on the variety. Cover the seeds with about 1/4 inch of soil and water them well. If planting seedlings, dig a hole large enough to accommodate the root ball and plant at the same depth it was growing in its container.
  6. Watering: Water the plants regularly until they are established. Once established, Echinacea is quite drought-tolerant, so you only need to water during prolonged dry spells.
  7. Maintenance: Echinacea requires very little maintenance. You can deadhead the flowers to encourage more blooms, but it’s not necessary. Leaving the spent flowers on the plant can provide food for birds during the winter.
  8. Fertilizing: Echinacea does not require a lot of fertilizer. You can apply a balanced, slow-release fertilizer in the spring if desired.
  9. Mulching: Applying a layer of mulch around the base of the plants can help retain moisture and suppress weeds.
  10. Dividing: Echinacea plants can be divided every 3-4 years in the spring or fall if they become overcrowded.

Remember, Echinacea is a perennial, so it will come back year after year. It’s also a great plant for attracting butterflies and bees to your garden!

Medicinal Uses

Echinacea has been used for centuries for its medicinal properties, and it is one of the most popular herbal supplements in the United States and Europe. Here are some common medical uses of echinacea:

  1. Immune System Support: Echinacea is most commonly used to boost the immune system. It is believed to stimulate the body’s immune response by increasing the production of white blood cells and activating macrophages and natural killer cells.
  2. Cold and Flu: Many people take echinacea at the first sign of a cold or flu to reduce the severity and duration of symptoms. However, research on the effectiveness of echinacea for preventing or treating colds and flu has produced mixed results. Some studies have found that it can reduce the risk of catching a cold or may help reduce the duration and severity of cold symptoms, while others have found no benefit.
  3. Respiratory Infections: Echinacea is also used to treat other respiratory infections, such as bronchitis and sinusitis.
  4. Wound Healing: Echinacea has anti-inflammatory and antimicrobial properties, and it has been used topically to help heal wounds, skin infections, and other skin conditions, such as eczema and psoriasis.
  5. Urinary Tract Infections: Echinacea is sometimes used as a natural remedy for urinary tract infections (UTIs).
  6. Pain Relief: Echinacea has been used traditionally to relieve pain associated with headaches, toothaches, and sore throat.
  7. Anti-inflammatory: Echinacea has anti-inflammatory properties, which may help reduce inflammation and swelling.
  8. Antioxidant Properties: Echinacea contains compounds with antioxidant properties, which may help protect the body’s cells from damage caused by free radicals.
  9. Antiviral and Antibacterial Properties: Echinacea has antiviral and antibacterial properties, which may help fight off infections.

It’s important to note that while echinacea is generally considered safe for short-term use, it can cause side effects in some people, such as nausea, dizziness, and rash. It may also interact with certain medications or other herbal supplements. Therefore, it’s always recommended to consult with a healthcare professional before using echinacea or any other herbal supplement, especially if you are pregnant, breastfeeding, have an autoimmune disorder, or are taking other medications or supplements.

What to Plant in March in Alabama

What to Plant in March in Alabama

What to Plant in March in Alabama

If you’re like me, you’re anxiously waiting for spring to arrive. The daffodils are starting to peek up through the soil, and the trees are beginning to bud. But even though it’s still chilly outside, that doesn’t mean you can’t start planting in your garden! In this blog post, we will discuss what plants do well in March in Alabama. We’ll also give you a few tips on how to care for them. So if you’re ready to get your hands dirty, keep reading!

One of the most important things to remember when planting in Alabama is that it is still possible for frost to occur. So, you’ll want to wait to plant anything that is sensitive to cold until the danger of frost has passed. That being said, there are still plenty of plants that will do well in cooler weather. Here are a few of our favorites:

Vegetables

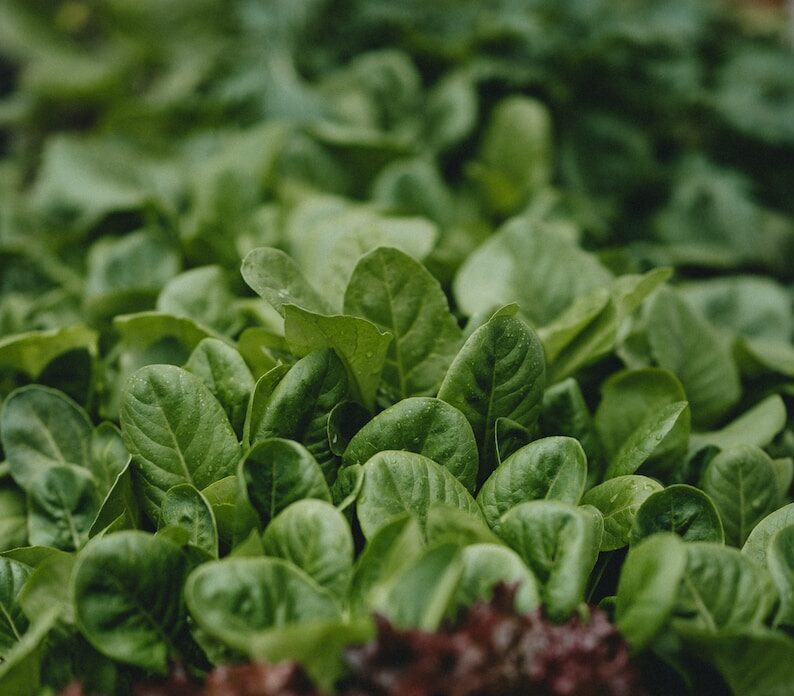
Lettuce: Lettuce is a cool weather crop that does well in Alabama. It can be planted as early as February and will continue to produce until the weather gets too hot. Just be sure to keep an eye on the temperatures and protect your plants if there is a chance of frost.

Spinach: Spinach is another cool weather crop that can be planted in February or March. It will continue to produce until the weather gets too hot. Just like lettuce, you’ll want to keep an eye on the temperatures and protect your plants if there is a chance of frost.

Radishes: Radishes are a great crop to plant in March. They do well in cool weather and can be harvested just a few weeks after planting.

Carrots: Carrots are another great option for March planting. They take a little longer to mature than other cool weather crops, but they are well worth the wait!

Flowers

Petunia: Petunias will tolerate cold weather and a light frost. They should be kept dry and avoid water sitting on the foliage.

Calibrachoa: Calibrachoa (ka·luh·bruh·kow·uh) will tolerate cold weather and a light frost. They should be kept dry and avoid water sitting on the foliage.

Now that you know what to plant in March, let’s talk about how to care for your new plants. One of the most important things to remember is to not over water during cold periods. Alabama can be quite wet in early Spring, so make sure to give your plants enough water to stay healthy but not too much. Also, be sure to fertilize them every few weeks. This will help them grow strong and produce lots of flowers or vegetables!

So what are you waiting for? Get out there and start planting! Your garden will thank you for it.

Gardening with Spring Annuals in Alabama

Gardening with Spring Annuals in Alabama

Planting annual plants is a great way to bring color and vibrancy to your garden. But heading to the garden center can be a daunting experience. With so many types of plants, it’s hard to know which ones are right for you and your needs. Whether you are a beginner or an experienced gardener, here is a guide to help you choose the best plants at your garden center.

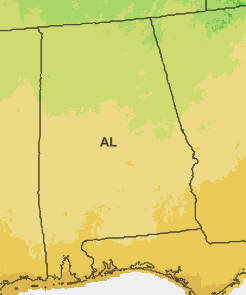
The first step in choosing the best plants is knowing what climate zone your home is located in. Northern Alabama is currently zone 7 and Southern Alabama is zone 8 with parts of Mobile and Baldwin counties in zone 9. Different climates have different temperatures and moisture levels that affect how well certain plants will grow.

Hibiscus Ballet Slippers

Shopping for the Right Plant

Once you know which type of plants are suitable for your climate, it’s time to start looking for healthy specimens at the garden center. When selecting a plant, check if it has white healthy roots and robust foliage growth; avoid any plants with yellowing leaves or wilting stems as they may already be diseased or stressed. Also, look for signs that pests may be infesting the plant.

Before bringing any plant home, it’s important to understand its specific requirements so you can provide it with proper care once it’s planted in your garden. For example, some plants require full sun while others prefer shade; some need more water than others while some tolerate drought better than most; some need regular fertilizing while others don’t require any additional nutrients at all—these are all factors that should be taken into consideration when selecting a plant from the garden center. Doing research ahead of time or talking with garden center staff will ensure that you choose only those plants that fit into your existing landscape and match your gardening style and skill level.

To Bloom or Not to Bloom is the Question

If you’ve ever gone to the nursery or garden center and seen the lush, vibrant blooms of plants that have already begun flowering, you may be tempted to buy those immediately. After all, who wouldn’t want a beautiful garden full of color? But marketing has created a myth that blooming plants are better than plants not yet in bloom. And it couldn’t be further from the truth! In fact, plants that have yet to begin blooming are better to handle the stress of transplanting.

When you transplant a plant, it experiences physiological stress—it essentially goes into shock as it adjusts to its new environment. When a plant is experiencing stress, it takes energy away from processes like rooting, foliage growth, flowering or fruit production. That means if you transplant a blooming plant, there will be less energy available for root and foliage growth because so much was used up producing flowers. On the other hand, if you transplant a non-blooming plant, more of its energy can go into rooting and foliage growth before producing flowers.

Plants not yet in bloom offer numerous advantages over blooming plants when it comes to successful gardens—from less stress due to an abundance of energy available for root and foliage growth after transplanting, to improved success rates due to reduced disease issues from stress. So next time you head out shopping for your garden or landscaping project, remember that although those beautiful blooms may look enticing now, non-blooming plants can provide even greater success and blooming rewards down the road!

Adding Compost and Fertilizer to Improve Soil Quality

Have you ever noticed that some gardens are lush and vibrant, while others look more like a barren wasteland? The difference is often due to the soil quality. Poor soil can lead to unhealthy plants, low yields, and discolored foliage. Fortunately, there’s an easy fix: composting or adding fertilizer. Let’s explore how these two methods can help improve your soil!

Composting is the process of breaking down organic matter such as leaves and kitchen scraps into a nutrient-rich soil amendment. It’s an easy way to add beneficial bacteria and nutrients to your garden without spending money on costly fertilizers or additives. Compost also helps improve the structure of your soil by increasing its water holding capacity. Not only will this make your plants healthier, but it will help reduce water waste as well! Additionally, composting is incredibly easy—all you need is a large container (or even just a pile) and some kitchen scraps or yard clippings.

Fertilizer is another great way to amend your soil. Unlike composting, which relies on bacteria and fungi to break down materials over time, fertilizer adds nutrients directly to the soil in the form of nitrogen, phosphorus, potassium, and other micronutrients. Applying fertilizer regularly can provide a quick boost of nutrition for your plants and encourage growth. However, it’s important not to overdo it; too much fertilizer can burn plants or cause them to become leggy due to excessive phosphorus levels.

Whether you choose composting or fertilizing (or both!), improving the quality of your soil with either method will result in healthier plants that yield greater harvests than before. By taking the time to amend your soil now with either compost or fertilizer, you’ll be able to enjoy a more bountiful garden for years to come! Whether you’re a beginner gardener looking for tips on how to get started or an experienced green thumb looking for ways optimize their current gardening efforts, adding compost or fertilizer should be high up on the list of things that you do!

Deadhead Flowers for Continuous Blooms

Did you know that deadheading flowers can help keep your garden looking healthy and vibrant? Deadheading is the process of removing spent blooms from plants to encourage new growth. It’s an important yet simple gardening task that can have a big impact on your garden’s appearance.

Deadheading flowers can help promote new growth, create fuller plants with more blooms, and improve the overall plant health. When you deadhead a flower, it redirects nutrients back into the plant instead of allowing them to be used in the development of seeds. This means that energy is directed towards creating more blooms and foliage. Additionally, by removing spent flowers, you are reducing chances of disease.

Start by snipping off any wilted or brown flowers near the base of the flower with sharp scissors or pruners. Be sure not to cut too far down into any unopened buds or plant stems. Once all of the old flowers have been removed, take a few steps back and check if there are any more faded flowers that need removing before moving onto another plant in your garden!

Deadheading spent flowers is an essential gardening task for keeping your garden looking vibrant and healthy throughout the growing season. By removing spent blossoms from plants as soon as they begin to fade, you can promote new growth and enjoy longer lasting blooms in your garden!

Following these tips can help ensure your spring annuals have the best chance for survival and can put on a show all season long!

Planting and Growing Potatoes in Alabama

If you’re an Alabamian looking to plant potatoes, the timing of your planting is essential. Plant too soon and the cold temperatures may cause damage to the crop; plant too late and there may not be enough time for a successful harvest before Summer temperatures. Fortunately, with a little knowledge and planning, you can ensure that your potato-planting project will yield a bountiful harvest.

When To Plant Potatoes In Alabama

The best time to plant potatoes in Alabama is typically between early February and early March. This gives them plenty of time to fully develop before the hot summer months arrive. It’s important to keep in mind that each variety of potato has its own individual needs when it comes to planting times, so be sure to check the instructions on your seed potato for specifics.

Before you start planting, make sure that your soil is ready. The ideal soil temperature should be between 55°F and 65°F (12-18°C). You can check this by taking a 6 or 8 inch deep soil sample from several different points in your garden area and measuring the temperature with a thermometer. Once the soil has reached this temperature range, you can begin planting.

One important thing to remember when planting potatoes in Alabama is that there are two main types—early varieties and late varieties—and each requires different timing for optimal success. Early varieties are best planted early, while late varieties should wait until mid-March or later. Additionally, certain areas within Alabama may require different planting times due to differences in climate or terrain; talk to local gardeners or specialists at your local garden center for advice specific to your area if needed.

In conclusion, if you’re an Alabamian looking to plant potatoes this year, timing is key! Aim for February through March as an optimal time frame for the majority of potato varieties. However, always double check the instructions on your seed potato before getting started and don’t forget that certain areas within Alabama may require different planting times due to differences in climate or terrain. With a little knowledge and planning you can make sure that your potato-planting project yields a delicious harvest!

Planting Potatoes in the Right Soil

Potatoes are a hardy crop that grows well in a variety of soils and climates. However, growing them successfully means understanding which type of soil is best for planting potatoes. Let’s take a look at what makes the perfect soil for planting your potatoes.

The ideal soil for growing potatoes is loamy soil with good drainage. Loam is a combination of sand, silt, and clay particles that help provide structure to the soil and enable it to hold both water and nutrients. This type of soil also has plenty of organic matter, which helps create an environment that encourages healthy potato growth.

If your soil isn’t quite as loamy as you would like it to be, there are ways to improve it before planting your potatoes. You can do this by adding compost or manure to the soil, which will help add more organic material and improve its texture over time. You should also make sure your soil has plenty of drainage by testing it with a shovel or spade and making sure it doesn’t become saturated when you water it.

The pH level of your soil is another important factor when it comes to growing potatoes successfully. The optimal pH level for potato plants is between 4.8 and 5.4, but they will still grow if the pH level is slightly higher or lower than this range as long as other environmental factors are favorable for their growth. To test the pH level of your soil, use an inexpensive testing kit from your local gardening store or nursery.

The Basics of Planting and Harvesting Potatoes

When planting potatoes, you want to make sure that they are buried deep enough in the soil so that their stems have plenty of room to grow and develop. Generally speaking, you want your potatoes planted 4-6 inches down into the soil. However, this may vary depending on your climate and type of soil you’re working with. If your soil is heavy and moist, you may need to plant them closer to six inches down; if it is light and sandy, closer to four inches will do.

You also want to make sure that you leave about 12-18 inches between each potato when planting them in a row. This gives each potato ample space for its roots and stem growth. This spacing also applies when planting multiple rows of potatoes—it’s important not to overcrowd them! Potato plants will yield more abundantly when given plenty of space.

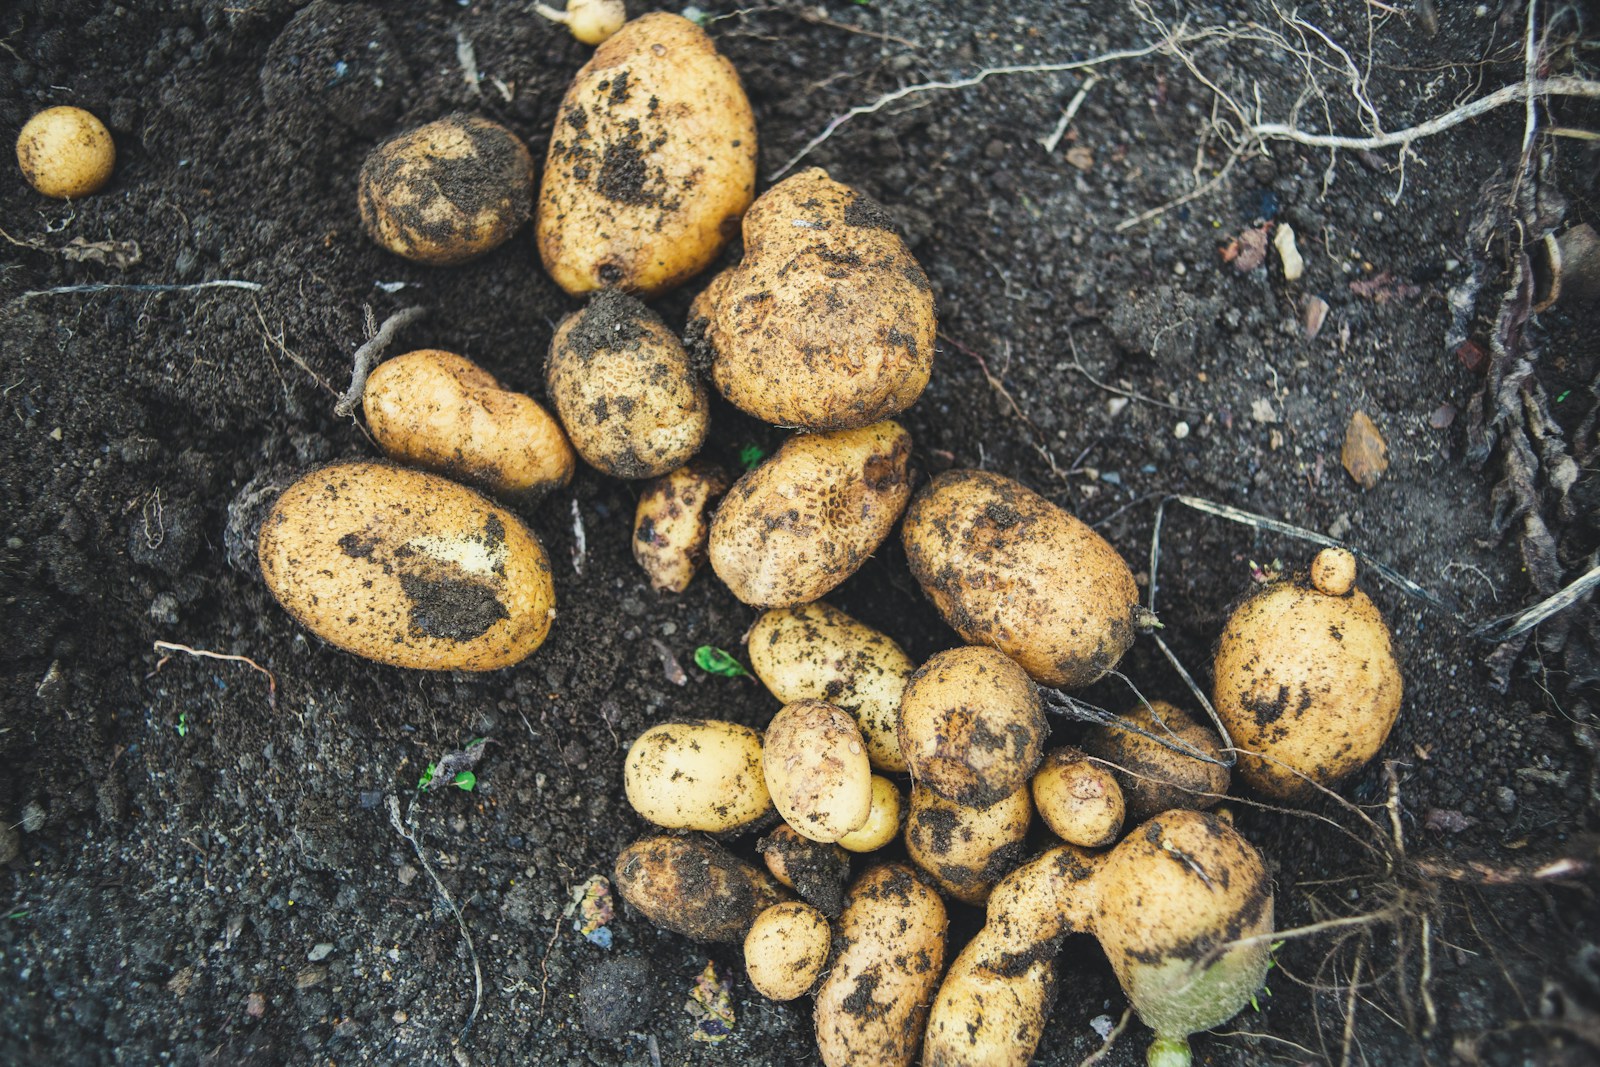
It usually take about 70-80 days from planting for your potatoes to be ready for harvest time! When harvesting potatoes, it’s important not to dig too deeply as this can harm or damage the tubers while they’re still growing underground. The best way is just use a garden fork or hoe around the base of the plant gently pushing away some dirt until you see a few tubers near the surface which can then be easily pulled up out of the ground by hand. Be sure not wait too long though – once potato tops turn yellow and begin dying off it means that they are done growing and any remaining tubers left in the ground won’t mature enough before winter sets in so they must be harvested quickly!

Planting potatoes doesn’t have to be difficult or intimidating – if you know what depth you should bury them at and give them adequate spacing between plants then you’ll have no problem achieving a bountiful harvest come harvest time! Just remember: Plant your potatoes 4-6 inches down into the soil with 12-18 inches between each potato when planting in rows or beds, wait until 70-80 days from planting time has passed before harvesting, and use a garden fork or hoe around the base of your plants when harvesting instead of digging deeply so as not disturb any still-growing tubers underground! With these tips in mind, happy gardening!

Harnessing the Sun’s Energy with Passive Solar Greenhouse

Harnessing the Sun’s Energy with Passive Solar Greenhouse

Have you ever wanted to use the sun’s energy to heat your greenhouse more efficiently? If so, passive solar heating is worth considering. This type of harnessing of the sun’s energy works by trapping and storing heat from the sun during the day and then releasing it at night. Read on to learn more about passive solar heating and how it can work in a greenhouse environment.

What is Passive Solar Heating?

Passive solar heating is a method of collecting, transferring, and storing energy from sunlight with minimal use of other energy sources. The idea is to have a structure that catches, stores, and distributes solar radiation as heat throughout the day. How this works in practice is that you install materials in your greenhouse (such as walls or windows) that absorb some of the sun’s radiation and store it for later use. This stored heat then radiates back into your greenhouse space during cooler nights when there isn’t direct sunlight, keeping your plants warm without having to use electric or gas-powered heating systems.

How Does Passive Solar Heating Work In A Greenhouse?

The basics of passive solar heating involve utilizing materials that absorb heat from the sun during hours when there is direct sunlight. These materials then store this heat until nightfall when they release it back into the greenhouse environment, keeping things warm even when there isn’t direct sunlight available. To make sure this system works correctly, you need to place these materials strategically around your greenhouse and also ensure proper insulation so that any excess heat doesn’t escape before it can be used. The most suitable materials for this are usually dark colored surfaces such as stone or asphalt which can absorb large amounts of light directly from the sun while still holding onto enough warmth to last through a cold night.

Passive solar heating systems are an efficient way to keep your plants warm without having to rely on traditional gas or electric powered heating systems. By strategically placing materials around your greenhouse which absorb and store heat from direct sunlight during peak hours of sunshine, you can ensure that your plants stay warm even during colder nights where there isn’t direct sunlight available. With careful planning and implementation, passive solar heating can drastically reduce your reliance on external sources of energy while also saving you money over time!

Designing the Perfect Passive Solar Greenhouse

If you’re looking to grow your own produce, creating a passive solar greenhouse is one of the best ways to do it. Not only is a passive solar greenhouse energy-efficient and inexpensive to build, but it also allows you to control the climate inside your greenhouse, giving you the perfect environment for growing healthy and delicious fruits and vegetables. Here are some tips on how to design a great passive solar greenhouse.

Location is Key: When building your passive solar greenhouse, it’s important to consider where you place it in relation to sunlight exposure. Find an area that receives maximum sun exposure throughout the day—ideally 6 or more hours of direct sunlight. Consider any potential shade from trees or buildings and make sure there’s enough room for air circulation around the structure.

Glazing Material Matters: The type of glazing material you use for your greenhouse will have an impact on its overall performance. Single-glazed polyethylene plastic film is lightweight and offers excellent UV protection, but it can be easily damaged by hail or strong winds. Look for a double-glazed option with two layers of plastic film that provides better insulation without compromising visibility or light transmission. You can also opt for rigid glazing options like glass or acrylic panels which provide better insulation but require additional support structures and may be more expensive than plastic films.

Orientation Counts: Orienting your greenhouse correctly is an important factor in optimizing its performance and efficiency. For maximum heat gain, position your structure so that the long side faces south while the short sides face east/west (depending on which hemisphere you live in). This will give you maximum solar exposure during winter when days are shorter while still allowing optimal ventilation during summer when temperatures tend to rise quickly inside greenhouses. Make sure all windows are facing south as well so that they get plenty of sun throughout the day and help keep temperatures warm at night.

Designing a passive solar greenhouse doesn’t have to be difficult if you follow these simple tips! Finding the right location with ample sunlight exposure, using appropriate glazing materials, and orienting your structure correctly are all essential steps in designing an efficient and energy-saving passive solar greenhouse that will help you grow delicious fruits and vegetables with minimal effort! Whether you’re a beginner gardener looking to save on energy costs or an experienced green thumb looking for new ways of controlling climate conditions within their greenhouses, following these tips should guarantee success! Good luck out there!

Fall Vegetable Garden in Alabama: What, When, and How

If you’re like me, you enjoy spending time in your garden all year long. Although the weather is turning cooler, it’s not too late to plant a fall vegetable garden in Alabama. In this blog post, I’ll share some tips on how to get started. So if you’re looking for something to keep you busy in the coming weeks, planting a fall garden is a great option!

What to Plant in Your Fall Garden

Some of the best fall vegetable garden crops include leafy greens and cruciferous vegetables. Leafy greens like lettuce, spinach and kale are fast-growing and can be harvested just a few weeks after planting. Cruciferous vegetables like collards, cabbage and broccoli are also great for fall gardens. They take a little longer to mature than leafy greens but are packed with nutrients.

fall vegetable garden
  • Broccolli
  • Brussels Sprouts
  • Cabbage
  • Cauliflower
  • Collards
  • Kale
  • Lettuce
  • Mustard
  • Onion
  • Pac Choi
  • Spinach
  • Swiss Chard

When to Plant Your Fall Garden Crops

The best time to plant your fall garden crops in Alabama depends on the type of crop you’re planting and the soil temperature. Leafy greens and cruciferous vegetables all have different planting and harvest times. For leafy greens, the best time to plant is September, October and November. For cruciferous vegetables, the best time to plant is September and October. Frost can slow maturity or damage some crops. Frost can also significantly increase the intensity and flavor of many fall vegetable crops.

How to Plant Your Fall Garden Crops

Planting your fall garden crops is easy! Just follow these simple steps:

  1. Prepare your garden bed by tilling the soil and removing any weeds or rocks.
  2. Sow your seeds or transplants in furrows or rows at the recommended spacing for each crop.
  3. Mulch around your plants to help retain moisture and keep weeds at bay.
  4. Water regularly and fertilize as needed.

That’s it! Just sit back and watch your garden grow!

Harvesting Fall Vegetable Crops

  • Broccolli – Most varieties mature in 60-80 days, but a few can take up to 100. Cut the center head out before the flowers begin to open. The side shoots will be harvest-able a few weeks later. Frost can damage the heads.
  • Cabbage – Varieties mature in 50-80 days with some taking up to 120 days. Each plant is only a single harvest by cutting the head out. Hard freeze frost can cause plants to begin to rot from the inside.
  • Collards and Kale – Can be harvested at any time. For a long and sustainable harvest, only remove the outer most leaves and the center will continue to grow new leaves. Cutting the center stem will terminate the growth of new leaves. The flavor intensifies with frost and plants can survive hard frost.

Autumn Farmhouse Design: How to Incorporate Rustic Decor into Your Home

The leaves are changing color and the days are getting shorter. That can only mean one thing: autumn is here! This time of year is perfect for cozy, rustic decor. If you’re looking to add a touch of farmhouse charm to your home, read on for some tips. We’ll show you how to incorporate natural materials like wood and stone into your design, and give you some ideas for adding warm colors and textures. Let’s get started!

One of the best things about autumn farmhouse design is that it’s all about cozy, comfortable living. This time of year is perfect for snuggling up by the fire with a good book or spending time outdoors in the crisp air. To get started incorporating this style into your home, start with natural materials like wood and stone. Exposed beams, hardwood floors, and stone fireplaces are all great ways to add rustic charm. Then, add in some warm colors and textures to really make your space feel cozy. Rich earth tones like deep reds and oranges are perfect for fall, and adding a few throws or pillows in these colors can really transform a room. Finally, don’t forget the finishing touches. Pumpkins, hay bales, and corn stalks are all great ways to add a touch of seasonal flair to your home.

Using Garden Mums in Fall Decor

Mums are a great way to add color and texture to your home this fall, and there are many different ways to use them. We’ll show you how to incorporate mums into your decor in both traditional and nontraditional ways, and give you some ideas for using them in both indoor and outdoor spaces. Let’s get started!

One of the best things about garden mums is that they come in so many different colors. This makes them perfect for adding color and interest to your fall decor. You can use them in arrangements indoors or out, and there are many different ways to do it. For a classic look, try grouping mums in baskets or pots on your porch or patio. You can also use them to create colorful floral arrangements for your Thanksgiving table. If you’re looking for a more unconventional approach, try using mums in place of leaves on a wreath or garland. You can also make a mum centerpiece for your dining table or coffee table. No matter how you choose to use them, mums are a great way to add some autumn flair to your home.

Check Your Hay Bales for Critters

Seasonal fall holiday decorating. Front door autumn decor.

Ants can be a nuisance, and you don’t want them invading your home just because you’re trying to add a little bit of autumn charm. So before you go out and buy any hay bales, take a few minutes to inspect them for ants. You can do this by looking for ant trails or by shaking the bale and seeing if any ants fall out. If you find any ants, try to find a different source for your hay bales, or take steps to get rid of the ants before using them.

So what are you waiting for? Get started on your autumn farmhouse design today! With these tips, you’ll have your home looking cozy and stylish in no time. Happy decorating!

The Truth About Fertilizer: Debunking the Myths

The Truth About Fertilizer: Debunking the Myths

There are a lot of myths created by marketing companies about fertilizer. Marketing has convinced people that it is some kind of magical substance that will make their plants grow big and strong overnight. The truth is, however, that fertilizer is just like any other tool- it can be used effectively or it can be misused. In this blog post, we will debunk the marketing myths about fertilizer and discuss how you can use it to improve your garden!

What do the fertilizer numbers really mean?

All growing plants need essential elements to grow to their full genetic potential. The NPK, Nitrogen, Phosphorus, Potassium, makes up the primary nutrients plants need. The other elements needed by plants are called minor elements, micronutrients or secondary nutrients. These include: sulfur, magnesium, calcium, iron, manganese, copper, zinc, boron, molybdenum and chlorine.

Fertilizer comes in different NPK ratios. The number on the bag or bottle is the percentage of how much of each kind of nutrient is in it. For example, 10-10-10 has 10% of Nitrogen, 10% of Phosphorus, and 10% of Potassium.

  • Nitrogen is the most important nutrient and helps with leaf growth.
  • Phosphorus helps plants to use and store energy.
  • Potassium helps with overall plant health and plants’ abilities to resist disease.

Nitrogen comes in many forms, but can only be used by plants in ammonium or nitrate form. Urea, the cheapest form, must first be broken down to ammonium before plants can utilize it. Ammonium is fast-acting and can burn plants if not used correctly. Nitrate is the safest and most effective form of nitrogen for plants. Excessive amounts of urea can build up over colder months and burn plants once the weather warms up due to increased break down to ammonium form.

Phosphorus is essential for plant growth and is found in every cell of a plant. Marketing Myth: High levels of phosphorus make plants bloom more aka bloom booster. Fact: Phosphorus helps plants to use and store energy, but too much phosphorus can make plants weak and unhealthy. Excess phosphorus easily combines with minor elements and prevents their uptake by plants, leading to minor element deficiencies.

Potassium is found in all plant tissues and is important for overall plant health and the plant’s ability to resist disease. It is associated with the movement of water, nutrients and carbohydrates in plant tissue.

When to apply fertilizer?

plant nutrition deficiency

The best time to apply fertilizer is when plants are actively growing. This is typically in the spring and summer, but can also be in the fall for certain plants. Applying fertilizer to late in the growing cycle can make plants more susceptible to cold damage and disease. Fertilizer applied to dormant plants can actually do more harm than good because the plant cannot utilize the nutrients and the excess nutrients build up in the soil. The excess nutrients can also leach through the soil and contaminate groundwater.

Plants can tell you when and what type of fertilizer to use. The location of yellowing leaves can indicate a lack of several types of nutrients, iron deficiency will show in newer leaves while nitrogen and magnesium deficiency will show in older leaves first. Older leaves turning purple can be a sign of low phosphorus.

Other factors that affect fertilizer

Soil pH plays a big part in the availability of nutrient up take by plants. Most nutrients are available to plants with a soil pH range of 5.6-6.2. Some plants grow better in the lower range and other prefer the higher range. Petunia and calibrachoa are two types of annuals that prefer the lower range and will quickly show iron deficiency above 5.8 pH. Geraniums and marigolds prefer the higher range and show iron toxicity below 5.8 pH.

Kale: The Perfect Vegetable to Grow in Your Garden

Kale: The Perfect Vegetable to Grow in Your Garden

Need a easy to grow leafy green to add to your garden, kale is a great choice. Kale is hardy and can withstand cold weather, so it’s a good option for gardeners in colder climates. Kale also grows well in containers, so it’s a good choice for urban gardeners or those with limited space.

Kale comes in several varieties, so be sure to choose the variety that best suits your needs. Some varieties are more heat tolerant than others, so if you live in a warm climate, be sure to choose a heat-tolerant variety.

Kale is relatively easy vegetable to grow and doesn’t require a lot of care. Just be sure to water it regularly and fertilize it every few weeks. You can also mulch around the plants to help keep the soil moist.

If you’re looking for a nutritious leafy green to add to your garden, kale is a great choice. Kale is packed with vitamins and minerals, and it’s a good source of fiber. Kale is also low in calories, so it’s a great choice for those watching their weight.

So what are you waiting for? Get out there and start growing some kale! Your garden will thank you for it.

When to Plant Kale in Alabama

Kale is considered a cool season vegetable for Alabama, but can be planted at any time. But the best time to plant kale is in the fall, around September or October. Kale can also be planted in the spring, around March or April. It can tolerate frost and temperatures well below freezing.

For season long harvest, take only the oldest lower leaves and new leaves will grow from the top-center growth point. Cutting the top off will stop new growth and end harvesting. Once the plants bolt (flower) then the leaves become bitter.

Hardy Hibiscus: How to Grow and Care for These Magnificent Flowers

Hardy Hibiscus, Rose Mallow, Swamp Mallow, Hibiscus moscheutos

If you’re looking for a beautiful, long-blooming flower to add to your garden, look no further than the hardy hibiscus! These magnificent blooms come in a variety of colors, and can be grown in almost any climate. In this blog post, we will discuss how to grow and care for these flowers. We’ll also provide tips on choosing the right variety for your needs. So read on to learn more about these amazing plants!

What are Hardy Hibiscus?

Hardy hibiscus are a type of flowering plant that is native to tropical and subtropical regions. They are known for their large, showy flowers, which can be up to 12 inches in diameter! Hardy hibiscus come in a variety of colors, including white, pink, red, and purple. These flowers typically bloom from late summer to early fall, and their blooms can last for up to two weeks.

Where to Plant Hardy Hibiscus?

Hardy hibiscus can be grown in almost any climate, Zone 5-9, as long as they are planted in an area that receives full sun. They prefer well-drained soil, and will need to be watered regularly during the growing season. When choosing a location to plant your hardy hibiscus, make sure to select an area that is large enough to accommodate the plant’s mature size. These plants can grow to be up to six feet tall and four feet wide, so they will need plenty of space to thrive!

How to Care for Hardy Hibiscus?

Hardy hibiscus are relatively low-maintenance plants, but there are a few things you can do to ensure that they thrive. First, make sure to deadhead the flowers regularly to encourage new blooms. Secondly, fertilize your plants once a month during the growing season with a balanced fertilizer. Lastly, cut the plants back to about two feet in height in late fall to encourage new growth in the spring.

What do you do with hardy hibiscus in the winter?

North Alabama, you may need to provide additional protection, such as wrapping the plant in burlap or placing it in a protected area. Central and South Alabama should need no protection.

With a little care, hardy hibiscus can provide you with beautiful blooms for many years to come! So don’t hesitate to add these plants to your garden today.

Theme: Overlay by Kaira