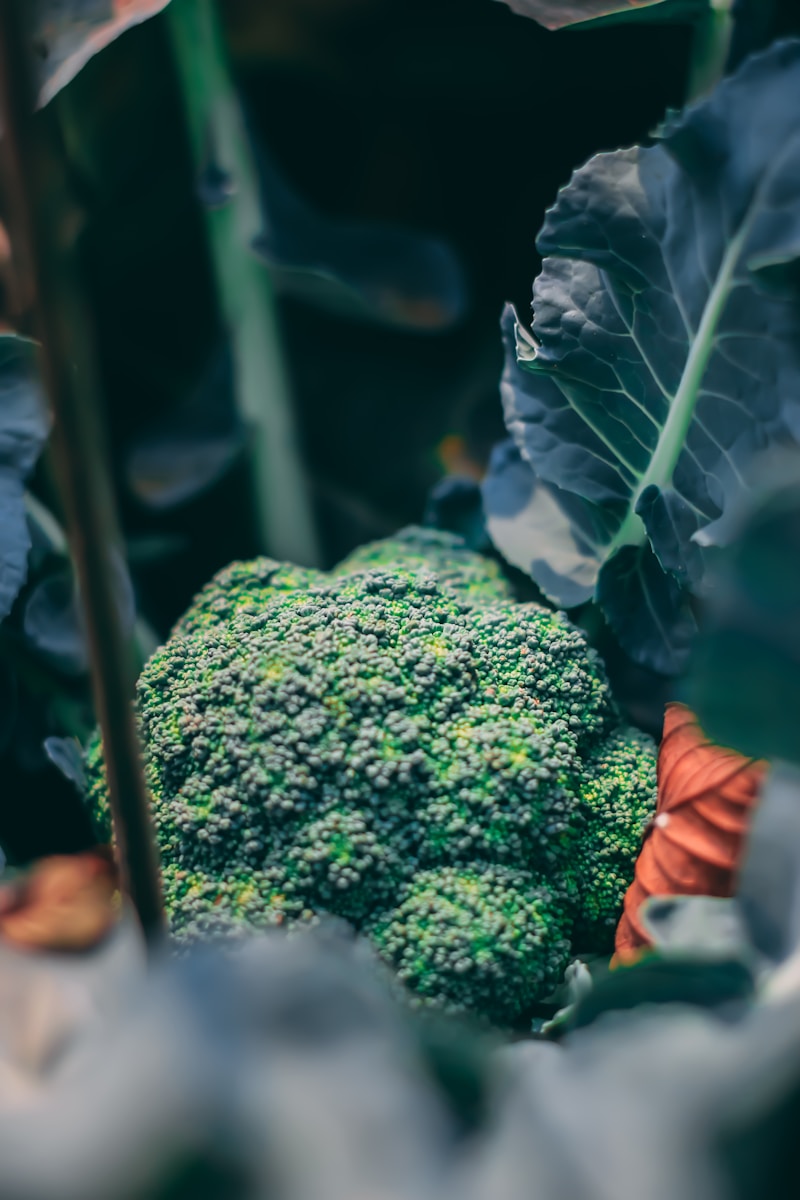
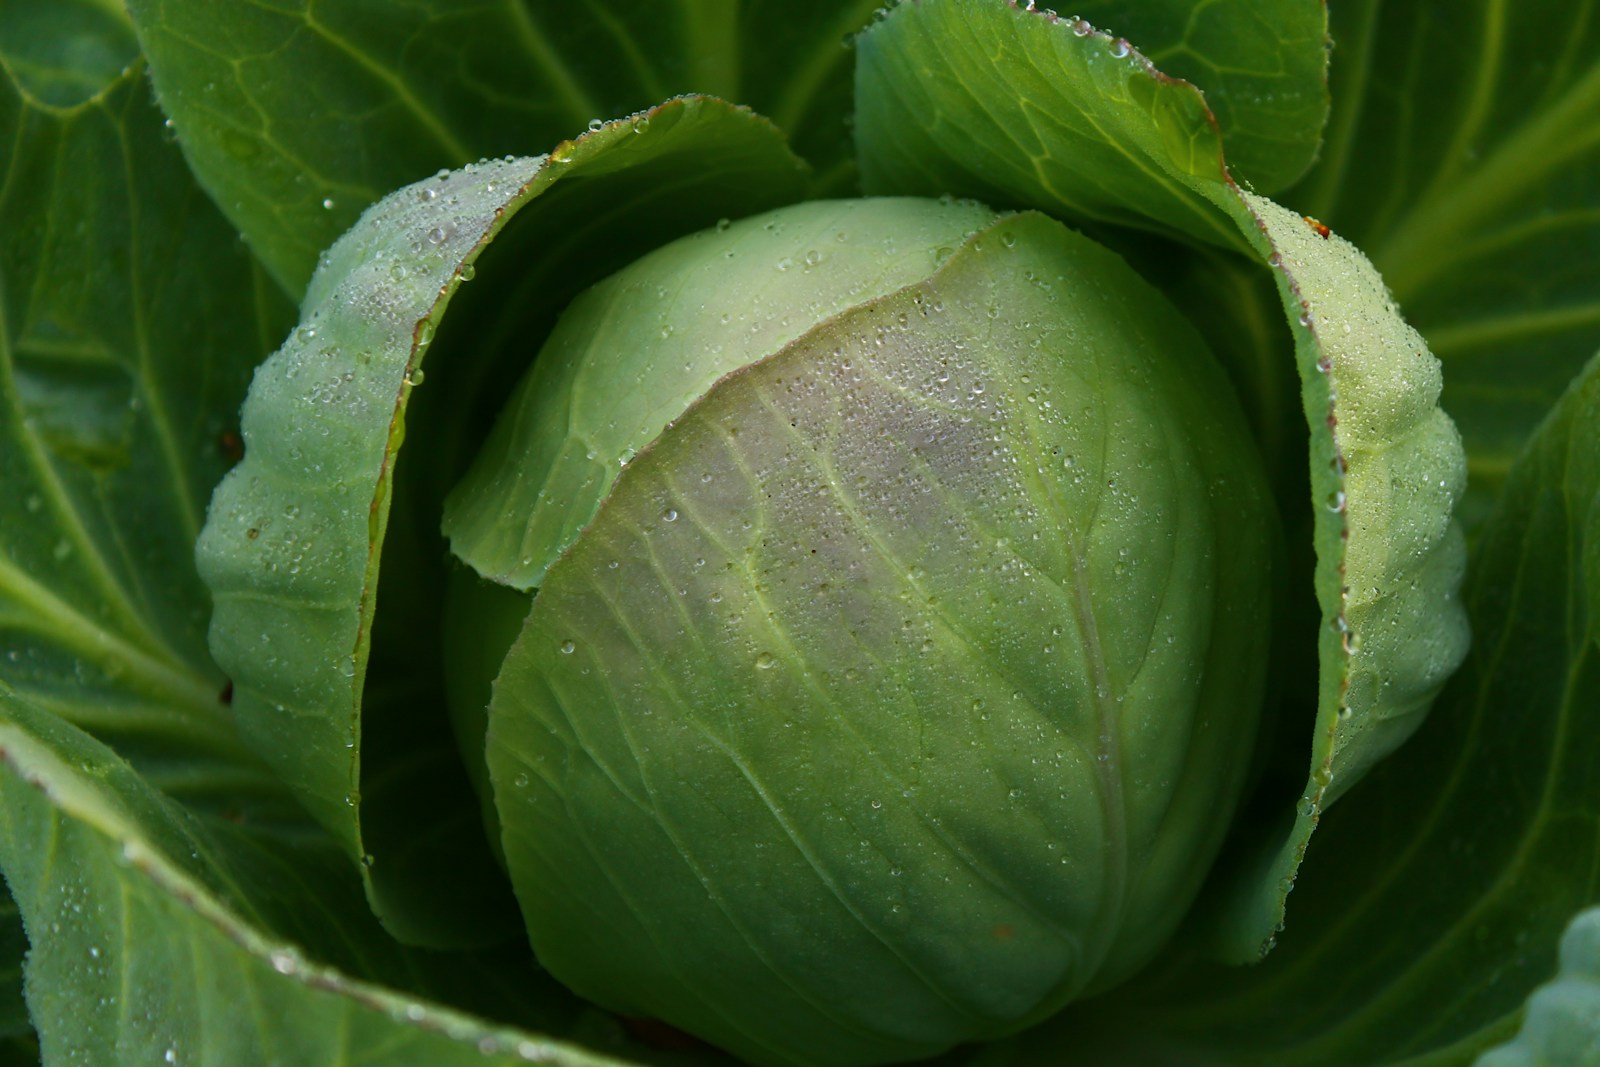
How and When to Plant Cabbage in Alabama

Cabbage loves a cool breeze. Alabama gives it two chances each year. We get soft winters. We get long falls. That means we can grow crisp heads for slaw, soups, and sautés almost all year if we plan well. In this guide, we walk through when to plant, how to plant, and how to keep those heads tight and sweet. In other words, we keep it simple, local, and doable.


Why Cabbage Fits Alabama

Cabbage is a cool-season crop. It grows best when days are mild and nights are cool. Heat makes it cranky. Cold makes it sweeter. Alabama offers both mild springs and long, gentle falls. That is our edge.

  • It can handle light frost.
  • It hates long stretches above 80–85°F.
  • It tastes sweeter after a nip of frost.

So our goal is simple. We set plants so they size up in cool weather and finish before steady heat.


Know Your Alabama Seasons

Alabama is not one uniform garden. North Alabama cools first and warms later. Central Alabama sits in the middle. The Gulf Coast stays warm longer. That is why our planting dates shift by region. But most of all, the idea stays the same: spring and fall windows.

  • North Alabama (Tennessee line to roughly Birmingham’s latitude): cooler overall, earlier frosts.
  • Central Alabama (Birmingham–Montgomery band): moderate, long fall.
  • South Alabama and the Coast (Montgomery south to Mobile and Baldwin Counties): mild winters, late frosts.

Instead of chasing exact dates, watch your local last spring frost and first fall frost. Cabbage plants are tough, but tiny seedlings still like gentle care. Plan with that in mind.


Quick Timing at a Glance

Use this as a starting point. Adjust a week or two for your yard’s microclimate.

Spring Plantings

  • North Alabama:
    • Start seeds indoors: late January to mid-February.
    • Transplant outside: early to mid-March (2–4 weeks before last frost).
  • Central Alabama:
    • Start seeds indoors: early to late January.
    • Transplant outside: late February to early March.
  • South Alabama / Gulf Coast:
    • Start seeds indoors: December to early January.
    • Transplant outside: January to early February.

Fall Plantings (often the best season here)

  • North Alabama:
    • Start seeds indoors or in shade: late June to mid-July.
    • Transplant outside: late July to mid-August.
  • Central Alabama:
    • Start seeds: early to late July.
    • Transplant: early to late August.
  • South Alabama / Gulf Coast:
    • Start seeds: late July to August.
    • Transplant: late August to September (even early October in very mild spots).

In other words, spring sets go out a bit before your last frost. Fall sets go out so they head up in October–December, when nights cool and flavor shines.


Choosing the Right Variety for Alabama

Heat tolerance matters in our state. So does timing. Pick varieties that match your window and plate.

  • Early, small heads (55–70 days): ‘Golden Acre,’ ‘Early Jersey Wakefield,’ ‘Copenhagen Market.’ These are quick and great for spring when heat is coming.
  • Midseason, solid heads (70–85 days): ‘Bravo,’ ‘Blue Vantage,’ ‘Cheers.’ These handle our fall heat better and finish strong when nights cool.
  • Red types: ‘Red Express’ (early), ‘Ruby Perfection’ (later, dense). Add color and crunch to salads.
  • Savoy (crinkled leaves): ‘Savoy Ace,’ ‘Deadon’ (colors deepen with cold). Tender and beautiful for winter plates.
  • Storage types (firmer, later): choose mid-to-late varieties if you want to hold heads longer in cool storage.

Small heads fit tight spaces and mature fast. Large heads need more days, more room, and steady moisture. Pick what fits your schedule and bed space.


Start Seeds or Buy Transplants?

Both work. Here’s how to choose.

Start Seeds If You Want…

  • Exact varieties.
  • Strong, hardened plants on your schedule.
  • Lower cost per plant.

Buy Transplants If You Want…

  • Speed.
  • A head start when time is tight.
  • Less fuss with germination in summer heat.

Seed Starting Basics

  • Start 4–6 weeks before outdoor transplant time.
  • Use a quality seed mix and clean trays.
  • Keep seeds cool for fall starts. Germination drops in high heat. Use shade, airflow, and bottom watering.
  • Provide strong light.
  • Harden off for 5–7 days before planting out. Set trays outside in light shade. Increase sun and time each day. Ease them into wind.

Bed Prep the Alabama Way

Our soils vary. North Alabama may have heavier red clay. The Gulf Coast often has sandy soils that drain fast. Cabbage wants rich, well-drained, slightly acidic to neutral soil.

  • Target pH: 6.2–6.8. Lime acidic soil as needed.
  • Add organic matter: 2–3 inches of compost or well-rotted manure worked into the top 8–10 inches.
  • Raised beds: Warm faster, drain faster, and keep roots happier after big rains.
  • Fertility: Cabbage is a heavy feeder. Mix a balanced, slow-release fertilizer or compost into the bed before planting. Save some nitrogen for side-dressing later.

Spacing

  • Small heads: 12–15 inches between plants, 18–24 inches between rows.
  • Medium heads: 18 inches between plants, 24–30 inches between rows.
  • Large heads: 20–24 inches between plants, 30–36 inches between rows.

Tighter spacing gives smaller heads but more per bed. Wider spacing grows bigger heads and boosts airflow.


Transplanting: A Simple Step-by-Step

  1. Water the trays an hour before planting.
  2. Plant at the same depth as in the cell. Do not bury the crown.
  3. Firm the soil around each plug to remove air pockets.
  4. Water in well. Add a gentle starter (like fish emulsion or a balanced liquid feed).
  5. Mulch 2–3 inches with straw, pine needles, or shredded leaves. Mulch keeps roots cool and steady.
  6. Use row cover for the first 2–3 weeks. It reduces transplant shock, wind stress, and early caterpillars.

Direct Seeding?
You can, but fall heat makes germination tricky. If you try it, sow a little deeper (¼–½ inch), keep the top inch of soil moist, and give light shade. Thin to the final spacing once seedlings are sturdy.


Water, Feeding, and Mulch

Cabbage loves even moisture. Uneven water can cause split heads and stress.

  • Watering: Aim for 1 to 1.5 inches per week, more in sandy soils. Morning is best. Soak the root zone, not the leaves.
  • Feeding plan:
    • Pre-plant: Compost or slow-release fertilizer.
    • Side-dress #1: 3–4 weeks after transplanting with a nitrogen boost along the row.
    • Side-dress #2: When heads are golf-ball size, give a lighter boost.
    • Stop heavy feeding once heads start to firm. Too much late nitrogen can cause splits.
  • Mulch: Keeps roots cool, stops weeds, and saves water. Push mulch away from stems so crowns stay dry.

Micronutrients note: On very sandy soils, boron can be low. Deficiency shows as brown, hollow centers. Instead of guessing, send a soil test before the season. If boron is low, follow the test’s rates. A little goes a long way.


Heat and Cold Management

Alabama heat is our main challenge. We turn that into a plan.

  • For fall starts: Use 30% shade cloth over hoops the first 2–3 weeks. This cuts heat while roots establish.
  • Row covers: Great in spring and fall. They warm cool mornings and block moths that lay eggs on leaves.
  • Frost handling: Cabbage tolerates light frost; it can taste better after it. Cover only for hard freezes or if plants are very young.
  • Bolting (early flowering): Usually from heat or stress. Keep plants evenly watered and avoid pushing spring crops deep into May heat.

The Alabama Pest Parade (and How We Win)

We have insects. We also have smart ways to stay ahead. Integrated pest management (IPM) keeps things simple and safe.

Caterpillars (Imported cabbageworm, cabbage looper, cross-striped worm)

  • Symptoms: Chewed leaves, green droppings, small green or gray caterpillars.
  • Prevention: Row covers right after transplanting. Check leaves weekly.
  • Control: Hand-pick when you see them. Use Bacillus thuringiensis (Bt) for young larvae. Spinosad is another option used carefully. Spray late in the day and follow labels.

Harlequin Bugs

  • Symptoms: Bright orange-and-black shield bugs, clustered on leaves. Leaves look shot-holed and wilted.
  • Prevention: Remove wild mustard and weedy brassicas nearby.
  • Control: Hand-pick into soapy water. Use row cover early. Plant a small mustard “trap crop” nearby, then remove it with the pests on it.

Aphids

  • Symptoms: Sticky residue, curled leaves, clusters under leaves.
  • Control: Blast with water, encourage lady beetles, or use insecticidal soap or neem. Avoid heavy nitrogen, which can spike aphids.

Slugs and Snails

  • Symptoms: Ragged holes and silver trails, worst in cool, wet spells.
  • Control: Keep mulch tidy. Use iron phosphate baits. Hand-pick at dusk.

Diseases to Watch

Black Rot (bacterial)

  • Clues: Yellow V-shaped lesions starting at the leaf edge, dark veins.
  • Prevention: Buy clean transplants. Rotate brassicas every 3–4 years. Do not work plants when wet. Remove infected leaves.
  • Watering: Drip or soaker hoses beat overhead watering.

Downy Mildew (fungal-like)

  • Clues: Pale, fuzzy patches under leaves in cool, wet weather.
  • Prevention: Good airflow and spacing. Water in the morning. Remove badly infected leaves.

Clubroot

  • Clues: Swollen, club-like roots; plants wilt on warm days and fail to size up.
  • Prevention: Keep pH near 6.8–7.0. Rotate for several years. Do not move soil from infected beds.

Good hygiene wins half the battle. Clean tools, remove crop debris, and rotate families. In other words, give new plants a clean start.


Harvest: The “Bowling Ball” Test

Cabbage tells you when it is ready. Heads turn firm and heavy.

  • Press the head. It should feel like a bowling ball.
  • Cut at the base with a sharp knife, leaving a few wrapper leaves for protection.
  • Stump sprouting: Some gardeners notch the stump to get a few small “cabbage sprouts” later. These are bonus minis for stir-fries.

Splitting: If rain is coming and heads are close to ready, harvest early or gently twist the plant to break a few feeder roots. This slows water uptake and reduces splits.

Storage: Keep heads cold and humid. The crisper drawer works well. Do not wash until you use it. Many heads hold for weeks, even longer with steady cold.


Succession Planting and Staggered Harvests

Instead of one big harvest day, try small waves.

  • Plant every 2 weeks within your window.
  • Mix early and midseason varieties.
  • Use tighter spacing for quick, small heads early.
  • Shift to wider spacing for larger fall heads.

This rhythm spreads your workload and your meals.


Companion Ideas (and One to Avoid)

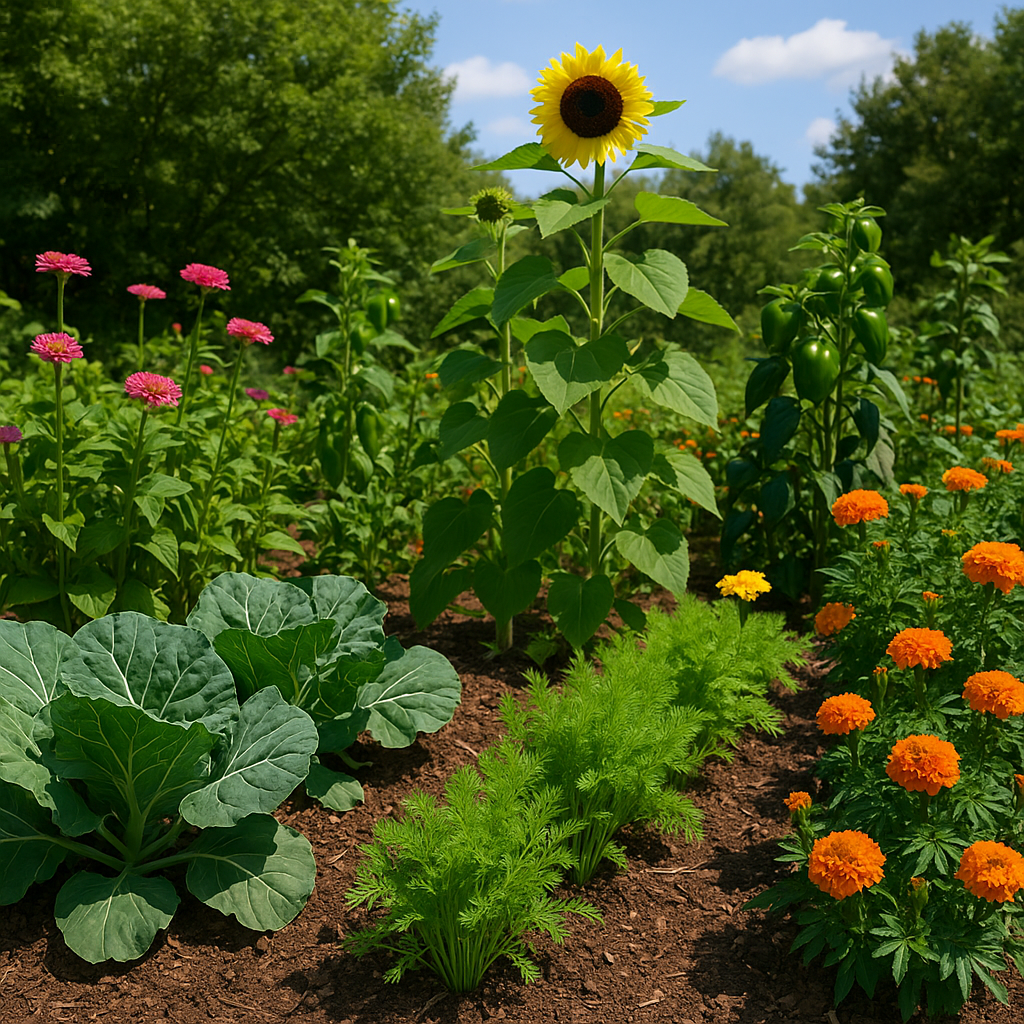
  • Good neighbors: Dill, onions, garlic, and thyme can confuse pests and fit the bed edges.
  • Trap crop: A small patch of mustard draws harlequin bugs away from your cabbage. Remove the trap crop if it gets swarmed.
  • Avoid: Planting brassicas after brassicas. Rotate to peas, beans, or roots the next season. In other words, keep the family moving.

Containers and Small Spaces

Yes, you can grow cabbage in pots.

  • Container size: At least 5 gallons per plant; 12 inches deep.
  • Mix: High-quality potting mix with compost blended in.
  • Water: Check daily in warm spells; pots dry fast.
  • Fertilize: Light feed at planting, then side-dress or use a balanced liquid feed every 2–3 weeks until heads start to firm.
  • Placement: Full sun in winter and spring. Light afternoon shade in early fall heat.

Troubleshooting: What Went Wrong?

Heads not forming

  • Causes: Heat stress, too much shade, crowded spacing, or late nitrogen.
  • Fix: Plant earlier in fall or earlier in spring; give 6+ hours of sun; thin or replant with wider spacing; stop heavy feeding once heads begin.

Bitter taste

  • Causes: Heat and drought stress.
  • Fix: Choose fall timing; mulch; water evenly.

Yellow leaves at the base

  • Causes: Normal aging, low nitrogen, or wet roots.
  • Fix: Remove old leaves; side-dress once if plants are still sizing; improve drainage.

Holes in leaves

  • Causes: Caterpillars or beetles.
  • Fix: Row cover early; scout weekly; hand-pick; use Bt for young caterpillars.

Plants topple or wilt midday

  • Causes: Clubroot, root damage, or dry soil.
  • Fix: Check roots; adjust pH to 6.8–7.0; rotate fields; water deeply.

Month-by-Month Planner (North • Central • South)

Use this as a friendly rhythm. Shift a week or two for your spot.

January

  • North: Start planning and seed orders.
  • Central: Start seeds late month for spring.
  • South: Transplant spring cabbage now; protect on cold snaps.

February

  • North: Start seeds indoors.
  • Central: Transplant late month on mild days.
  • South: Transplant and maintain steady moisture.

March

  • North: Transplant early to mid-month; use row cover.
  • Central: Spring crop growing fast; feed lightly.
  • South: Watch heat; harvest early varieties as they firm.

April

  • North: Heads sizing; harvest early types.
  • Central: Harvest early; shade cloth if warm.
  • South: Finish spring harvest before heat kicks in.

May

  • North: Wrap up spring cabbage.
  • Central: Wrap up; pull plants before deep heat.
  • South: Clean beds; plant summer cover crops.

June

  • North: Prep for fall; solarize or rest beds.
  • Central: Same; plan varieties.
  • South: Plan fall; gather shade cloth and row cover.

July

  • North: Start fall seeds late month in shade.
  • Central: Start fall seeds.
  • South: Start seeds late month.

August

  • North: Transplant fall sets late July–mid-August; use shade.
  • Central: Transplant all month; feed lightly after establishment.
  • South: Transplant late August–September; keep seedlings cool.

September

  • North: Plants growing; side-dress once.
  • Central: Keep even water; watch for caterpillars.
  • South: Transplanting continues early; row cover on hot days.

October

  • North: Heads begin to firm; enjoy cool nights.
  • Central: Harvest early heads; let midseason types size.
  • South: Strong growth; first frost still far.

November

  • North: Main harvest; protect on hard freezes.
  • Central: Harvest sweet fall heads.
  • South: Harvest begins; flavor deepens.

December

  • North: Finish harvest; store heads.
  • Central: Keep picking; protect during hard freezes.
  • South: Peak harvest; enjoy the sweetest cabbage of the year.

A Simple Alabama Planting Recipe

  1. Pick your window: spring or fall. In Alabama, fall is usually easier.
  2. Choose your variety: quick early types for spring; sturdy midseason for fall.
  3. Start seeds 4–6 weeks ahead or buy healthy transplants.
  4. Prep beds: compost, correct pH, and set your spacing.
  5. Transplant on a mild day: water in, mulch, and add row cover.
  6. Feed twice: once at 3–4 weeks, once at golf-ball head size.
  7. Scout weekly: remove pests early; keep water even.
  8. Harvest firm heads: twist or cut, then chill.
  9. Rotate beds: move brassicas to a new spot next season.

Instead of making it complex, we follow these steps and keep our rhythm.


Pro Tips from Local Beds

  • Stagger your plantings. Two or three waves spread the harvest.
  • Use shade cloth for fall transplants. Two weeks of shade can make or break success.
  • Do not overfeed late. Too much nitrogen late means soft heads and splits.
  • Keep leaves dry in the evening. Morning watering limits disease.
  • Try a mustard trap crop. Sacrifice a small patch to save your main beds.
  • Soil test every year or two. It saves money and prevents guesswork.

What to Cook When Harvest Hits

You grew it. Now let’s enjoy it.

  • Sweet slaw with vinegar and a touch of sugar after the first frost.
  • Cabbage steaks seared in a cast-iron pan.
  • Stuffed leaves simmered low and slow.
  • Quick kimchi for a tangy bite.
  • Stir-fried ribbons with garlic and sesame.

After more than a season of care, one head can feed many plates.


Frequently Missed Details (That Matter Here)

  • Wind: Row covers reduce wind stress on young plants, especially on open hills.
  • Mulch timing: Mulch right after transplanting. Waiting even a week can spike weed pressure.
  • Weed edges: Keep pathways clean. Pests like to hide at bed edges.
  • Plant labels: Mark variety and date. This helps you learn your own perfect timing.
  • Cleanup: Pull stumps and old leaves at season’s end. This breaks pest cycles.

Your Alabama Cabbage Calendar, Your Way

We all garden on our own patch. Your hill may be breezier. Your fence may cast afternoon shade. Your soil may drain like sand or hold like clay. That is okay. We work with it. We adjust by a week here or there. We switch varieties if spring runs hot. We lean into fall for sweetness and steady growth.

In other words, we do not chase perfection. We build a simple plan and follow it. The plants do the rest.


Crisp Heads, Calm Steps

We can do this together. Pick the right window. Start strong with rich soil and steady water. Protect young plants, then lighten the touch as nights cool. Keep watch, not worry. After more than a few weeks, you will feel that firm head under your palm. It will feel like a small win with a big flavor. And it will taste like Alabama—cool mornings, warm afternoons, and a garden that fits the seasons we share.

How and When to Grow Lettuce in Alabama

How and When to Grow Lettuce in Alabama

Growing lettuce in Alabama can be one of the most rewarding parts of gardening. Lettuce is fast, forgiving, and incredibly satisfying to harvest fresh. But in Alabama’s warm, humid climate, timing is everything. Plant it at the right time, choose the right varieties, and use a few tricks to beat the heat, and you can enjoy lettuce almost all year long. This guide covers everything: timing, soil prep, varieties, container growing, and even tricks for succession planting to keep the salads coming.


Why Lettuce Belongs in Alabama Gardens

Lettuce is a cool-season crop. That means it loves Alabama’s mild winters and early springs but struggles when the heat of summer arrives. Unlike crops like tomatoes or peppers, lettuce grows quickly—often in 30 to 60 days—and can be planted multiple times in one season. This speed makes it ideal for Alabama gardeners who want quick results and steady harvests.

The other reason? Freshness. Grocery store lettuce can’t compare to what you cut from your own garden. Lettuce loses water and nutrients as soon as it’s harvested. In just one or two days, it can go limp in the fridge. But when you pick lettuce right from the garden, you taste crisp sweetness and subtle flavor you’ll never find in a bagged salad mix.


Alabama’s Climate: A Mixed Blessing

Alabama sits in USDA Hardiness Zones 7b to 9a. Winters are short and mild, while summers are long, hot, and humid. For lettuce growers, this is both a blessing and a challenge.

  • Blessing: Winters are mild enough to grow lettuce outdoors with minimal protection. In most of Alabama, you can plant fall crops that carry you through winter.
  • Challenge: Summer heat can cause lettuce to bolt (go to seed) and turn bitter. Even in spring, a sudden warm spell can ruin a crop if you aren’t careful.

Understanding this rhythm—cool winters, hot summers—is the secret to success.


Best Planting Windows for Lettuce in Alabama

You can grow lettuce twice a year in Alabama, sometimes three times if you time it carefully.

Spring Planting

  • North Alabama (Zone 7b): Sow seeds indoors in late February and transplant outdoors in early to mid-March. Direct sow outdoors mid-March through April.
  • Central Alabama (Zone 8a): Direct sow outdoors late February to late March.
  • South Alabama (Zone 8b–9a): Plant as early as late January and continue through March.

Fall Planting

  • North Alabama: Direct sow mid-August through early October.
  • Central Alabama: Sow late August through October.
  • South Alabama: Plant September through November. Mild winters may allow continuous growth with row covers.

Choosing the Right Lettuce Types for Alabama

Not every lettuce variety handles Alabama’s climate the same way. Some varieties tolerate heat and resist bolting, while others thrive only in cooler months.

Loose-Leaf Lettuce

  • Grows quickly and can be harvested leaf by leaf.
  • Handles Alabama’s unpredictable temperatures well.
  • Varieties: Black Seeded Simpson, Red Sails, Oakleaf, Salad Bowl.

Romaine (Cos) Lettuce

  • Upright heads with crisp texture.
  • More heat-tolerant than other types.
  • Varieties: Parris Island Cos, Jericho, Little Gem.

Butterhead Lettuce

  • Soft, tender leaves with sweet flavor.
  • Best in cool seasons; less heat-tolerant.
  • Varieties: Bibb, Buttercrunch, Adriana.

Crisphead (Iceberg) Lettuce

  • Tight, crunchy heads.
  • Harder to grow in Alabama heat—best for late winter or early spring.
  • Varieties: Great Lakes, Iceberg, Crispino.

Preparing Soil for Lettuce

Lettuce thrives in rich, well-drained soil. Alabama’s soils range from heavy clay to sandy loam, so amending the soil is key.

  1. Test the pH: Lettuce prefers pH between 6.0 and 7.0. Add lime to raise pH if your soil is acidic.
  2. Add Organic Matter: Compost or aged manure improves structure and fertility.
  3. Create Raised Beds: In heavy clay, raised beds improve drainage. In sandy soils, add organic matter to retain moisture.

Planting Lettuce: Direct Sow vs. Transplants

Lettuce can be grown two ways: sowing seeds directly in the garden or transplanting seedlings started indoors.

Direct Sowing

  • Best for loose-leaf and cut-and-come-again types.
  • Sow seeds ¼ inch deep in rows or scatter in blocks.
  • Thin seedlings to 6–8 inches apart for leaf types, 10–12 inches for heading types.

Transplanting

  • Start seeds indoors 4–6 weeks before planting outside.
  • Transplant hardened seedlings when 2–3 inches tall.
  • Transplants work well for romaine and butterhead varieties.

Succession Planting for Continuous Harvest

One of the joys of lettuce is its speed. You don’t need to plant it all at once. Instead, plant small amounts every two to three weeks. This staggered approach ensures a steady supply of tender leaves.

  • Spring: Start sowing in late winter and repeat every few weeks until May.
  • Fall: Begin again in late August and continue sowing through October.

By mixing fast-maturing loose-leaf varieties with slower romaine or butterhead types, you create layers of harvest: baby greens early, full heads later.


Watering and Fertilizing

Lettuce roots are shallow, so consistent moisture is critical. Alabama’s sun can dry soil quickly.

  • Watering: Keep soil evenly moist but not soggy. In hot weather, water daily or mulch to retain moisture.
  • Fertilizing: Use a balanced fertilizer (10-10-10) when seedlings are 3–4 inches tall. Side-dress every few weeks during heavy growth.

Managing Heat and Sun

Lettuce loves sun but not heat. As days warm up:

  • Provide afternoon shade using shade cloth or tall companion plants.
  • Plant heat-tolerant romaine or oakleaf varieties.
  • Harvest early in the morning for the crispest leaves.

Pests and Diseases in Alabama

Common Pests

  • Aphids: Spray with insecticidal soap or blast off with water.
  • Slugs and Snails: Use beer traps or sprinkle diatomaceous earth.
  • Cutworms: Use collars around seedlings.

Common Diseases

  • Downy Mildew: Avoid overhead watering; improve air flow.
  • Root Rot: Ensure soil drains well; avoid waterlogging.

Growing Lettuce in Containers

Container gardening is perfect for lettuce, especially if you lack space or want fresh greens close to the kitchen.

  • Use pots at least 6–8 inches deep.
  • Fill with high-quality potting mix, not garden soil.
  • Plant densely for baby greens or space 6–8 inches apart for heads.
  • Water daily in warm weather; containers dry out faster than garden beds.
  • Fertilize with diluted liquid fertilizer every two weeks.

Harvesting Lettuce

You can harvest lettuce at nearly any stage:

  • Baby Greens: Harvest when leaves are 3–4 inches long.
  • Cut-and-Come-Again: Snip outer leaves, letting inner leaves keep growing.
  • Heading Lettuce: Harvest whole heads when firm and mature.

For sweetest flavor, harvest in the morning when leaves are cool and hydrated.


Extending the Season

Want lettuce beyond spring and fall?

  • Row Covers: Protect against frost in winter and pests in spring.
  • Shade Cloth: Reduces heat stress in late spring and early summer.
  • Cold Frames or Hoop Houses: Allow lettuce growing almost year-round in Alabama’s mild climate.

Planting Calendar Snapshot

RegionSpring PlantingFall Planting
North ALMar – AprAug – Oct
Central ALFeb – MarAug – Oct
South ALJan – FebSep – Nov

Why Lettuce Is Worth Growing

Lettuce is one of the easiest crops for Alabama gardeners, but also one of the most rewarding. It grows fast, doesn’t take much space, and can be harvested again and again. A single packet of seeds can give you months of salads, wraps, and sandwiches—without a trip to the grocery store.


Fresh Greens All Season Long

With careful timing and a few tricks for shade and moisture, Alabama gardeners can grow lettuce almost year-round. Whether you’re planting rows in the backyard or pots on the porch, you’ll enjoy crisp, sweet greens that outshine anything from the store. Once you taste your first homegrown harvest, you’ll never want to stop planting.

Growing Brussel Sprouts in Alabama

Growing Brussels sprouts in Alabama is totally possible—with the right timing and care, you can enjoy fresh, flavorful sprouts straight from your garden. Whether you’re in north Alabama with colder winters or the southern coastal plain with milder conditions, this cool-season crop rewards patience with big flavor and impressive yields.

Let’s dig into everything you need to know about what Brussels sprouts are, when to plant them in Alabama, and how to grow them like a pro.

🌱 What Are Brussels Sprouts?

Growing Brussel Sprouts in Alabama

Brussels sprouts (Brassica oleracea var. gemmifera) are a member of the cabbage family. They look like tiny cabbages growing along a thick, upright stalk. Each plant can produce 50–100 “sprouts,” which are harvested individually as they mature.

They’re packed with vitamins C and K, fiber, and antioxidants. And when roasted, sautéed, or steamed just right, they’re delicious—even for people who once swore they hated them!

These plants thrive in cool weather. That’s important, because heat causes them to turn bitter and bolt (go to flower). In Alabama’s climate, timing is everything.

📅 When to Plant Brussels Sprouts in Alabama

In Alabama, you have two general planting windows, but fall is by far the best time to grow Brussels sprouts. That’s when you’ll get the best flavor and the longest growing window without dealing with heat stress.

Here’s a regional breakdown:

🟩 North Alabama (Zone 7a–7b)

  • Best planting time: Mid-July to early August (start seeds indoors)
  • Transplant outdoors: Late August to early September
  • Harvest: November through January

🟨 Central Alabama (Zone 8a)

  • Start seeds indoors: Early to mid-August
  • Transplant: Late August to mid-September
  • Harvest: December to early February

🟧 South Alabama (Zone 8b–9a)

  • Start seeds indoors: Mid to late August
  • Transplant outdoors: Early to mid-September
  • Harvest: January to March

❄️ Brussels sprouts need a touch of frost to develop that sweet, nutty flavor. In Alabama, a late fall or winter harvest gives you that magic moment.


🛠️ How to Plant Brussels Sprouts

Brussels sprouts aren’t hard to grow, but they need space, patience, and steady care. Let’s walk through the key steps.

1. 🧪 Choose the Right Variety

Some varieties do better in warmer climates and mature more quickly. Good picks for Alabama include:

  • Jade Cross – Compact, heat-tolerant, and early maturing.
  • Long Island Improved – Reliable heirloom with tight sprouts.
  • Diablo – Known for large sprouts and cold hardiness.
  • Dagan – Uniform, upright habit for easier harvests.

You can buy transplants at local nurseries in early fall or start your own from seed indoors.


2. 📦 Starting Seeds (Indoors)

  • Start seeds 6 to 8 weeks before your desired transplant date.
  • Use seed trays or pots with a well-draining seed-starting mix.
  • Keep them under a grow light or sunny window.
  • Germination happens in 5 to 10 days at 65–75°F.
  • Thin to the strongest seedling per pot.

Once your seedlings are 4–6 weeks old and have at least 4 true leaves, harden them off before transplanting outdoors.


3. 🪴 Transplanting Outdoors

  • Choose a sunny location (6–8 hours of sunlight per day).
  • Soil should be well-draining, fertile, and slightly alkaline (pH 6.5–7.0).
  • Add compost or aged manure to enrich the soil.
  • Space plants 18–24 inches apart in rows spaced 30–36 inches apart.
  • Water deeply right after planting.

Pro tip: Mulch heavily to keep weeds down and retain moisture!


4. 💧 Watering and Feeding

  • Water 1–1.5 inches per week—consistent moisture is key.
  • Avoid overhead watering to prevent disease.
  • Fertilize once a month with a balanced fertilizer (like 10-10-10).
  • Side-dress with nitrogen (such as fish emulsion or blood meal) midseason for better sprout production.

5. ✂️ Maintenance and Pest Management

Brussels sprouts are prone to a few pests and diseases. Here’s how to stay ahead of them.

Common Pests in Alabama:

  • Cabbage worms
  • Aphids
  • Harlequin bugs
  • Flea beetles

🛡️ Use row covers early on, hand-pick pests, or treat with neem oil or BT (Bacillus thuringiensis) if needed.

Disease Prevention:

  • Rotate your crops! Avoid planting in the same spot where other brassicas (cabbage, broccoli, kale) grew last year.
  • Keep leaves dry, especially in humid Alabama summers.
  • Remove lower leaves once sprouts start forming to boost airflow.

6. ⏳ When and How to Harvest

Here’s where it gets exciting!

  • Sprouts mature from the bottom up—you’ll see small buds form along the main stalk.
  • When sprouts are 1–2 inches wide and firm, twist or cut them off.
  • Remove yellowing leaves below the harvested sprouts.

You can harvest continuously for several weeks. Many gardeners harvest the lower sprouts and let the upper ones mature over time.

Want to push the plant to finish faster? Top the plant (cut off the growing tip) once the lower sprouts have formed. This signals the plant to put energy into the remaining buds.


🧊 Storage and Cooking Tips

  • Sprouts store in the fridge for up to 2 weeks.
  • For longer storage, blanch and freeze them.
  • Roast, sauté, steam, or shred them into slaws.
  • Pair with bacon, balsamic, garlic, or Parmesan for a flavor explosion.

🌿 Bonus Tips for Alabama Gardeners

  1. Companion plant with onions, garlic, beets, or marigolds to deter pests.
  2. Avoid planting near tomatoes or strawberries.
  3. Keep an eye on late-season weather—cover your plants if a deep freeze hits.
  4. Add some Epsom salt to your watering schedule if the leaves start yellowing (magnesium deficiency is common).
  5. Stake tall plants in windy areas—Brussels sprouts can get top-heavy.

💬 Why Grow Brussels Sprouts in Alabama?

Because it’s rewarding.

Because it’s a crop you can tend through the fall and winter while everything else fades away.

Because once you’ve tasted your own homegrown Brussels sprouts—fresh, frost-sweetened, and roasted to perfection—you’ll never look at the grocery store version the same way again.

And in Alabama, where warm soil meets cool winters, you’ve got the perfect blend to grow them well. All it takes is timing, care, and a little love.

When to Plant and How to Grow Apple Trees in Alabama

When to Plant and How to Grow Apple Trees in Alabama

Ah, apple trees—those iconic bearers of crisp, juicy fruit, evoking images of wholesome orchards, homemade pies, and that one apple you swore tasted sweeter because you picked it yourself. If you’re an Alabamian (or an honorary one), you might be wondering if growing apples in the Heart of Dixie is worth your time. Spoiler alert: it absolutely is!

But before you rush off to plant an orchard in your backyard, let’s talk about the when, where, and how of planting and growing apple trees in Alabama. Because let’s face it—this isn’t Washington state, and if you treat your apple trees like they’re in an evergreen wonderland, you might end up with a sad little twig instead of a fruitful bounty.

Best Time to Plant Apple Trees in Alabama

Timing is everything. Planting apple trees in Alabama is all about working with the seasons, not against them.

Ideal Planting Window

  • Late Winter to Early Spring (January – March): This is the best time to plant bare-root apple trees. The cool soil and moderate temperatures help the tree establish strong roots before the summer heat kicks in.
  • Late Fall (November – December): In South Alabama, where winters are mild, fall planting is possible. This allows the tree to develop roots before the next growing season.

Why Not Summer?

Alabama summers are no joke. If you plant in summer, your apple tree will likely fry like a piece of catfish in a cast-iron skillet. Heat stress, lack of proper root establishment, and excessive watering needs make summer planting a no-go.

Choosing the Right Apple Varieties for Alabama

Not all apples are suited for the sultry Southern climate. Forget about growing Honeycrisp (unless you enjoy heartbreak). Instead, opt for apple varieties that tolerate heat, humidity, and mild winters.

Best Apple Tree Varieties for Alabama

  • Anna – A low-chill variety that thrives in warmer climates.
  • Dorsett Golden – A cousin of the Golden Delicious, great for Alabama’s mild winters.
  • Ein Shemer – A reliable, self-pollinating variety that produces well.
  • Fuji – Slightly more cold-tolerant, but still manageable in Alabama.
  • Arkansas Black – An old Southern favorite, known for its firm texture and rich flavor.

The Pollination Puzzle

Apple trees aren’t loners. Most varieties need a buddy for cross-pollination. Planting at least two different compatible varieties nearby will significantly increase your chances of a good harvest.

Selecting the Perfect Planting Spot

Location, location, location. Your apple tree needs a prime piece of real estate to thrive.

Sunlight Requirements

  • Aim for at least 6–8 hours of full sun per day.
  • More sun = more photosynthesis = more apples.

Soil Requirements

  • Well-draining soil is key. Apple trees despise wet feet.
  • Sandy loam with a pH of 6.0-6.5 is ideal.
  • If your soil is heavy clay, consider raised beds or amending it with compost and sand.

Spacing

Give your trees room to breathe! Proper spacing prevents disease and ensures each tree gets enough sunlight.

  • Dwarf varieties: 8–10 feet apart
  • Semi-dwarf varieties: 12–15 feet apart
  • Standard varieties: 15–20 feet apart

How to Plant an Apple Tree in Alabama

Alright, you’ve got the perfect variety and the perfect spot—now let’s get that tree in the ground.

Step-by-Step Planting Guide

  1. Dig a Hole
    • Make it twice as wide and just as deep as the root ball.
    • This gives roots plenty of room to spread.
  2. Prep the Soil
    • Mix in compost to improve drainage and fertility.
    • Avoid chemical fertilizers at planting—they can burn young roots.
  3. Place the Tree
    • Position the tree so the graft union (the bump where the tree was grafted) is 2 inches above the soil.
    • This prevents the rootstock from taking over.
  4. Backfill and Water
    • Fill the hole with soil and gently tamp it down to remove air pockets.
    • Water deeply right after planting to help roots settle.
  5. Mulch for Moisture
    • Apply a 2-4 inch layer of mulch around the base, but keep it away from the trunk.
    • Mulch retains moisture and suppresses weeds.

Caring for Your Alabama Apple Tree

Planting is just the beginning. Now comes the part where you prove your green thumb.

Watering

  • Young trees (first year): Water once or twice a week (about 5-10 gallons).
  • Mature trees: Water every 7–10 days during dry periods.
  • Avoid overwatering. If the soil feels soggy, give it a break.

Fertilizing

  • Apply a balanced fertilizer (10-10-10) in early spring before new growth starts.
  • Don’t overdo nitrogen—too much will give you a leafy tree with no apples.

Pruning

  • Best time: Late winter (January–February), before bud break.
  • Goal: Remove dead or crowded branches to improve air circulation.
  • Tip: Keep an open center shape to let sunlight reach all parts of the tree.

Pest and Disease Control

Alabama’s humidity is a breeding ground for pests and diseases. Keep an eye out for:

  • Fire Blight: Causes branches to look scorched. Prune infected parts ASAP.
  • Apple Scab: Causes dark spots on leaves and fruit. Use resistant varieties.
  • Codling Moth & Apple Maggots: Wrap tree trunks with sticky bands to trap larvae.

Use organic sprays like neem oil or integrated pest management techniques to keep issues at bay.

When to Expect Apples

Patience, young orchardist. Apple trees don’t operate on instant gratification.

  • First fruits: Usually in 2-4 years for dwarf varieties and 4-6 years for standard trees.
  • Peak production: Around 7-10 years.
  • Harvest time: Most apples in Alabama ripen between July and October, depending on the variety.

To check if an apple is ripe, give it a gentle twist—if it comes off easily, it’s ready!

Is It Worth It?

Growing apple trees in Alabama takes planning, patience, and a willingness to fend off the occasional pest invasion. But the reward? Fresh, homegrown apples that taste better than anything store-bought.

So, roll up your sleeves, dig in, and start growing your very own Alabama apple orchard. And when you finally bite into that first crisp apple, you’ll know it was worth every drop of sweat.

Happy planting! 🍏🌳

When and How to Grow Peas in Alabama

Are you a gardening enthusiast in Alabama looking to grow your own delicious peas? You’ve come to the right place! This guide will walk you through the optimal times for planting peas, selecting the best varieties, preparing the soil, and everything else you need to know to achieve a bountiful harvest.

1. Introduction to the Ideal Planting Time for Peas in Alabama

In Alabama, the climate can be quite variable, but generally, the best time to plant peas is during the cooler months. For a spring crop, plant your peas between late January and early March. For a fall crop, aim for late August to early September. Peas thrive in temperatures between 55°F and 70°F, so timing is crucial.

2. Choosing the Right Pea Variety for Alabama’s Climate

Different pea varieties perform better in different climates. For Alabama, consider the following types:

  • Garden Peas (English Peas): Ideal for shelling and sweet when fresh.
  • Snap Peas: Perfect for eating whole, including the pods.
  • Snow Peas: Great for stir-frying and salads, as you eat the flat pods.

Choose varieties known for their heat tolerance and disease resistance, such as ‘Wando’ or ‘Green Arrow’ for garden peas, and ‘Sugar Ann’ for snap peas.

3. Preparing the Soil for Pea Planting

Peas prefer well-drained, loamy soil with a pH level between 6.0 and 7.5. Follow these steps to prepare your soil:

  1. Test Your Soil: Use a soil test kit to determine pH and nutrient levels.
  2. Amend the Soil: Add compost or well-rotted manure to enrich the soil and improve drainage.
  3. Till the Soil: Loosen the soil to a depth of about 6-8 inches to ensure good root growth.

4. Step-by-Step Guide to Planting Peas in Alabama

Follow these steps for planting peas:

  1. Spacing: Plant seeds 1 inch apart in rows that are 18-24 inches apart.
  2. Depth: Sow seeds about 1 inch deep in the soil.
  3. Support: Install trellises or stakes for climbing varieties to support growth.

5. Watering and Care Instructions for Healthy Pea Growth

Peas require consistent moisture, especially during flowering and pod development:

  • Watering: Water the plants deeply once a week, ensuring the soil remains moist but not waterlogged.
  • Mulching: Apply a layer of organic mulch to retain moisture and suppress weeds.
  • Fertilizing: Peas are light feeders, but a side dressing of balanced fertilizer (10-10-10) can help, especially if soil fertility is low.

6. Recognizing and Addressing Common Pea Plant Issues in Alabama

Keep an eye out for these common issues:

  • Pests: Aphids, pea weevils, and slugs can be problematic. Use insecticidal soap and natural predators to manage infestations.
  • Diseases: Powdery mildew and root rot are common in humid climates. Ensure good air circulation and avoid overwatering to mitigate these issues.

7. Harvesting Peas at the Optimal Time for Taste and Nutrition

Timing your harvest correctly ensures the best flavor and nutrition:

  • Garden Peas: Harvest when pods are plump but before they become too hard.
  • Snap Peas: Pick when pods are full and crisp but seeds are not fully developed.
  • Snow Peas: Harvest when pods are flat and before seeds start to swell.

8. Tips for Maximizing Pea Yields in Alabama Gardens

To maximize your pea yields, consider the following tips:

  • Succession Planting: Plant a new batch of peas every 2-3 weeks during the growing season to extend your harvest period.
  • Crop Rotation: Rotate your pea crops each season to prevent soil depletion and reduce disease risk.
  • Companion Planting: Grow peas alongside carrots, radishes, and turnips, which can help improve soil health and deter pests.

By following these steps, you’ll be well on your way to growing a successful pea crop in Alabama. Happy gardening!

Alabama Home Gardening

Gardening enthusiasts in Alabama are blessed with a diverse climate and rich soil that offer unique opportunities for home gardening. Whether you are a seasoned gardener or a beginner, the combination of Alabama’s natural beauty and its supportive gardening community makes it an ideal place to grow your own garden oasis.

The Allure of Home Gardening in Alabama

Home gardening in Alabama is more than just a leisure activity; it’s a lifestyle that brings families and communities together. The state’s mild winters and hot summers provide a varied growing season that allows for a wide range of plants, vegetables, and flowers to thrive. The impact of home gardening extends beyond personal satisfaction, contributing positively to local communities by promoting sustainability and self-reliance.

Seasonal Gardening Tips

Understanding the seasonal nuances of Alabama’s climate is key to successful gardening. Here’s a comprehensive guide on what to plant and when:

Spring

Spring in Alabama is a season of renewal and growth. Ideal for planting:

  • Vegetables: Tomatoes, peppers, cucumbers, and squash.
  • Flowers: Marigolds, petunias, and zinnias.
  • Herbs: Basil, cilantro, and parsley.

Summer

Summer gardening can be challenging due to the intense heat, but it’s also the time for harvesting:

  • Vegetables: Okra, eggplant, and sweet potatoes.
  • Flowers: Sunflowers, hibiscus, and periwinkle.
  • Herbs: Oregano, thyme, and rosemary.

Fall

Fall offers a second chance for planting cool-season crops:

  • Vegetables: Broccoli, kale, radishes, and lettuce.
  • Flowers: Mums, pansies, and asters.
  • Herbs: Chives and sage.

Winter

While winter is milder in Alabama, it’s still a good time for certain activities:

  • Vegetables: Garlic and onions.
  • Flowers: Camellias and hellebores.
  • Herbs: Indoor herb gardens flourish well during this time.

Sustainable Practices in Alabama Gardening

Sustainability is becoming increasingly important in the gardening community. Here are some eco-friendly practices that are gaining traction in Alabama:

  • Composting: Creating nutrient-rich compost from kitchen waste helps improve soil fertility.
  • Rainwater Harvesting: Collecting rainwater reduces dependence on municipal water supplies and is excellent for plants.
  • Native Plants: Growing native plants like Alabama azaleas and oakleaf hydrangeas conserves water and supports local wildlife.
  • Organic Methods: Using organic fertilizers and pesticides reduces chemical runoff and promotes a healthier garden ecosystem.

Community Spotlight: Alabama Gardening Groups and Events

Alabama is home to a vibrant gardening community with numerous groups and events that bring people together:

  • Alabama Master Gardeners Association: Offers training programs and volunteer opportunities for gardening enthusiasts.
  • Local Farmers’ Markets: Places like the Pepper Place Market in Birmingham provide a venue for gardeners to sell their produce and connect with others.
  • Gardening Workshops: Held throughout the state, these workshops offer practical advice and hands-on experience.
  • Garden Tours: Events like the Alabama Garden Tour showcase beautiful home gardens and provide inspiration.

Benefits of Gardening for Mental and Physical Health

Gardening is not only a fulfilling hobby but also has numerous health benefits:

  • Mental Health: Gardening reduces stress, anxiety, and depression by promoting mindfulness and offering a sense of accomplishment.
  • Physical Health: Activities like digging, planting, and weeding provide moderate physical exercise, improving cardiovascular health and flexibility.
  • Nutritional Benefits: Growing your own fruits and vegetables ensures access to fresh and organic produce, contributing to a healthier diet.

Practical Advice for Beginners

Starting a garden from scratch can be daunting, especially in Alabama’s unique climate and soil conditions. Here are some tips to help you get started:

  • Soil Testing: Conduct a soil test to determine its pH and nutrient levels, which will guide your fertilization strategy.
  • Raised Beds: Consider using raised beds to better control soil quality and drainage.
  • Crop Rotation: Practice crop rotation to prevent soil depletion and reduce pest problems.
  • Watering: Water deeply and infrequently to encourage strong root growth. Early morning watering reduces evaporation.
  • Mulching: Use mulch to retain soil moisture, suppress weeds, and regulate soil temperature.

Home gardening in Alabama offers a rewarding experience that combines beauty, sustainability, and community spirit. By following seasonal tips, practicing sustainable methods, and engaging with local gardening groups, you can create a thriving garden that brings joy and health benefits to your life. Whether you’re a novice or a seasoned pro, the unique climate and rich culture of Alabama provide the perfect backdrop for your gardening journey.

When to Plant Spinach in Alabama

The Best Time to Plant Spinach in Alabama

Gardening is enjoyable and rewarding for many people, especially when growing vegetables. Spinach is a popular vegetable to grow in Alabama due to its nutritious benefits and relatively easy-to-grow nature. Suppose you want your spinach plants to thrive in the Alabama climate. In that case, understanding ideal climate conditions, choosing a suitable variety, planting at the right time for maximum yields, proper care and maintenance tips, and frost protection strategies are all essential. In this blog post, we will provide you with a comprehensive guide on how to successfully grow spinach in Alabama so that you can reap the rewards of healthy and delicious homegrown spinach!

Ideal climate conditions for planting spinach in Alabama

spinach in Alabama

Growing spinach in Alabama can be a rewarding experience when done correctly. Gardeners must understand the ideal climate conditions to help their spinach plants thrive. With the right soil type, temperature range, sun, and water needs, your spinach plants can yield delicious and nutritious greens throughout the growing season. Regarding the soil, spinach prefers a moist and well-drained environment. This means that gardeners should ensure their soil has good drainage so it does not get too soggy after watering or rain. The ideal temperature for growing spinach in Alabama is between 55°F and 65°F, making spring and fall some of the best times of year to plant your crop. Consider how much sun your plot receives; spinach can tolerate full sun or partial shade depending on preference and location.

You need to water your spinach regularly for optimal growth, but don’t overwater! Too much moisture can lead to wilting leaves, significantly reducing yields. Be mindful of frost during the colder months. If temperatures drop below 32°F, use a tarp or other protective material to shield plants from frost damage.

By following these tips for growing spinach in Alabama, you can create an environment where your crop will thrive! Remember these guidelines when planting this popular vegetable; you will soon enjoy fresh, homegrown greens all summer!

Choosing the right variety of spinach for Alabama

Choosing the right variety of spinach for Alabama is crucial in ensuring a successful harvest. Different varieties have different needs and requirements when it comes to temperature, water, and nutrients, so it is important to select a variety adapted to Alabama’s warm climate. Gardeners should consult their local county extension office to find out which varieties are best suited for their particular region and season, as some varieties are better suited for spring planting while others do better in the fall. The most popular spinach types grown in Alabama include Bloomsdale, Savoy, American, Tyee, and Space Spinach. Bloomsdale spinach grows best in warmer temperatures with plenty of light exposure. Still, it can withstand cooler temperatures if given adequate protection from frost. It produces large leaves with a wrinkled texture and has an excellent flavor. Savoy spinach generally has smaller leaves than Bloomsdale and grows in cooler temperatures during fall or early spring. American spinach can be planted earlier than other varieties due to its ability to tolerate heat and cold better than other types. Tyee spinach yields larger leaves than Bloomsdale or Savoy but requires more water for optimum growth. Finally, Space Spinach is known for its prolific yields even under cooler conditions, which makes it ideal for growing during late winter or early spring months in Alabama.

It’s also crucial to consider the soil type when selecting your variety of spinach for Alabama—some prefer sandy soils. In contrast, others do better with loam-based soils containing higher organic matter levels, such as compost or manure. Additionally, gardeners should consider how much sunlight their plot receives daily—spinach plants require at least 6 hours of full sun daily to produce healthy foliage and abundant harvests! With these considerations, gardeners can choose the perfect variety of spinach for their specific needs and conditions in Alabama!

When to plant spinach for maximum yields

Planting spinach in Alabama for maximum yields requires careful consideration of the climate and season. Spinach is usually planted between late winter and early spring when temperatures are mild and the soil has begun to thaw. Planting too early can result in frost damage while planting too late can lead to reduced yields due to warmer temperatures. The ideal temperature range for planting spinach is 45-75°F (7-24°C). Bloomsdale spinach should be planted as soon as the ground can be worked in mid-winter or late winter.

In contrast, Savoy spinach should be planted between late winter and early spring. American spinach can take a bit more cold and should be planted earlier than Bloomsdale or Savoy. Tyee spinach needs warm temperatures for optimal growth, so it should not be planted until after the last frost. Space Spinach is an especially hardy variety that will tolerate cold temperatures better than other varieties so that it can be planted at any time during the growing season in Alabama.

It’s important to consider successive plantings when planning your growing season. Planting a few rows of seeds every two weeks from mid-winter through spring will ensure a steady supply of fresh greens. Additionally, gardeners should wait until soil temperatures reach at least 50°F (10°C) before planting because cool soils will delay germination and slow growth rates. Harvesting begins approximately six weeks after planting when leaves are 2-3 inches tall; mature plants may require 45 days before reaching full size.

When harvesting spinach in Alabama, keep watch on nighttime temperatures since cool weather encourages fast growth and increases the risk of frost damage, which could significantly ruin your crop or delay its harvest date. If there’s a chance of frost coming overnight, protect your plants with blankets or row covers to keep them safe from harm. The most common pests affecting spinach include aphids, flea beetles, slugs, cutworms, and leaf miners; use preventive measures such as crop rotation and organic pest control methods such as beneficial insects or soap solutions to control these pests without harming your plants or the environment around them.

Care and maintenance tips for spinach grown in Alabama

Growing spinach in Alabama requires careful attention and maintenance to ensure plants thrive. To ensure success, gardeners should follow the following care and maintenance tips:Watering: Spinach plants need regular watering to prevent them from drying out. Water deeply, at least 1-2 inches weekly, either by hand or with a drip system. Avoid overhead watering when possible, as wet foliage can lead to disease and rot.

Pest & Disease Control: Monitor your spinach crop regularly for signs of pests or diseases such as aphids, flea beetles, slugs, cutworms, and leaf miners. To address an infestation, use organic pest control methods before applying chemical pesticides as a last resort. Additionally, rotate your crops to avoid soil-borne diseases that may affect your spinach crop.

Fertilization: Spinach needs plenty of nutrition to thrive in Alabama’s climate. Fertilize every four to six weeks using a balanced 10-10-10 fertilizer; alternatively, you can also use aged compost or manure. This will ensure that your spinach has enough nutrients for healthy growth throughout the season.

Mulching: Adding mulch around your spinach plants helps keep weeds down and conserve moisture in the soil during hot summer months; additionally, it helps protect plants from frost damage in cooler months. Use organic mulch such as straw or shredded leaves around plants about two inches deep on top of moist soil for best results.

Harvesting: Spinach is ready for harvest approximately six weeks after planting when leaves are fully grown but still tender and sweet-tasting; typically, this occurs between mid-spring and early summer in Alabama’s climate. Harvest carefully so as not to damage other surrounding vegetables or disrupt their root systems; cutting off the foliage at the base of the plant is recommended instead of pulling up by the roots, which can cause long-term damage to the crop.

By following these simple care and maintenance tips, gardeners can ensure healthy yields throughout the growing season in Alabama’s climate conditions – ensuring their spinach plants get all they need for optimal growth!

Frost protection strategies for spinach in Alabama

Frost protection is an essential part of growing spinach in Alabama. Cold temperatures can damage or kill spinach plants, so keeping your crop safe during winter is vital. A few strategies can be used to protect your spinach from frost, including using plastic or fabric row covers, mulching around the plants, and relocating sensitive plants to a sheltered area. Plastic or fabric row covers are one of the most effective methods for protecting spinach from frost. These materials are placed over rows of plants and provide an extra layer of insulation that keeps cold air away from them. This technique is handy for covering tender seedlings, raising temperatures to 8 degrees Fahrenheit. Planting in raised beds can also help insulate the soil and prevent frost damage.

Mulching around spinach plants is another way to protect them from frost damage. The mulch is an additional insulation layer that helps keep soil temperatures warmer throughout winter. It’s best to use organic material such as straw or wood chips for mulching since they will decompose slowly over time, providing continued insulation benefits throughout the season.

Finally, suppose you have susceptible varieties like Tyee or Savoy. In that case, it may be necessary to relocate them during cold weather months or severe frosts. Placing these plants near a wall or other structure will help protect them from cold winds and provide additional warmth from reflected heat off the walls themselves. Additionally, having a greenhouse can also come in handy for keeping delicate varieties safe during colder times of the year.

By following these guidelines on protecting your spinach plants in Alabama against frost damage, gardeners can ensure their crops will thrive throughout the growing season regardless of changing weather conditions.

When to plant turnips in Alabama

When to plant turnips in Alabama

Turnips are an often underrated vegetable that can be a delicious and nutritious addition to any garden. Whether you’re growing them for the first time or have been cultivating them for years, understanding when to plant turnips in Alabama is essential for successful harvesting. This article will explain the necessary steps for growing turnips in Alabama. With the right conditions, turnips can be a tasty addition to your home-grown vegetables!

Many try to grow turnips during the Summer, but we would advise against it due to high temperatures and pest pressure. Just feeding worms during the Summer!

What are Turnips

Turnips are a root vegetable with a unique sweet and earthy flavor. When eaten raw, they have a crisp texture; when cooked, they become soft and tender. This makes them ideal for various dishes, such as roasting, boiling, or braising.

Nutritionally speaking, turnips offer many benefits. They are high in vitamin C, fiber, and potassium while still low in calories and fat. These nutrients help improve the health of all body systems, including the digestive and immune systems. Additionally, turnips are rich in antioxidant compounds, which can protect cells from damage caused by free radicals.

Turnip greens can also be harvested during the season before roots are harvested. Their leaves can also be consumed as a nutritious green vegetable! The leaves are packed with essential vitamins A and K and minerals like calcium and iron. They also contain beneficial phytochemicals that may have anti-inflammatory properties, which could be helpful to overall health.

Turnips are an incredibly versatile fall vegetable that can easily fit into any diet due to its delicious taste and impressive nutritional profile! From salads to soups to side dishes – there’s no limit to how you can enjoy this delicious root vegetable!

when to plant turnips in alabama

Climate and soil requirements for growing turnips in Alabama

Growing turnips in Alabama requires a particular climate and soil type for success. The ideal climate for turnips is cool, with mild temperatures that don’t dip below freezing or rise above 80°F. Turnips also require light, well-drained soil with a pH between 5.5 and 6.5. Plant them in an area with at least six hours of sunlight daily. Choose an early spring or late fall time when temperatures are milder, and there is less risk of drought or frost damage.

To prepare the garden bed for planting, weed and break up large clumps of soil before adding compost or manure. Turnips should be planted about one inch deep in the soil, four inches apart. Plant and water them regularly until they’re ready to be harvested, about two months later.

Be mindful of pests and diseases that can damage turnips and Blackleg, which can cause rotting roots and stunted growth. To prevent problems, always plant different vegetables in different parts of your garden every year. Also, check your plants often for signs of pests or diseases.

Follow these guidelines to grow turnips in Alabama, which are delicious and nutritious! With the right conditions, turnips can be a delightful addition to your garden while providing essential vitamins and minerals with few calories.

Planting the seeds and caring for your turnip crop

Growing turnips in Alabama is a rewarding experience, but it requires careful preparation. Planting the seeds at the right time and in the ideal conditions is essential for a successful harvest. The optimal season to sow turnip seeds is late summer or early fall when temperatures stay mild, and soil temperatures range between 65-70°F. To plant, use a hoe or trowel to make rows 2 inches deep and 6 inches apart. Then, once the seedlings reach 4-6 inches tall, thin them out so the plants are spaced 4-6 inches apart.

Caring for your turnips during their growth period is equally important. Keep the soil moist by watering regularly, yet be sure not to overwater, as this could lead to root rot. Fertilize with a balanced fertilizer every few weeks and spread mulch around your plants to help keep moisture and discourage weeds. Pests and diseases can harm plants, so be careful. Look for holes in leaves or stems, wilting, discoloration, and spots on foliage. These may need treatment with organic methods like neem oil or insecticidal soap. Remove any diseased plants from the garden right away.

With these planting and care tips followed correctly in Alabama, you can look forward to harvesting nutrient-rich turnips throughout the season!

Harvesting and storing turnips from your garden

Harvesting and storing turnips from your garden is essential to enjoying this delicious and nutritious vegetable. When the root has reached a diameter of 2-3 inches, it is time to harvest. To ensure you have maximum flavor, try to pick your turnips as soon as they are mature.

The tops can be cut off for turnip greens, which some say taste better after a light frost. This helps to sweeten the leaves and reduce their bitterness. If you want to use the greens, keep at least two inches of stem attached when harvesting the root.

Turnip roots should be stored in a dry, cool place such as a root cellar or refrigerator and can last up to 3 months under ideal conditions. Keep them fresh by brushing or washing with cold water. Then, store them in airtight containers or plastic bags in the refrigerator crisper.

While storing turnips, check for wilted foliage, soft spots on the root, or slime on its surface. These are signs that turnips aren’t good to eat anymore.

If you use these guidelines for harvesting and keeping turnips from your Alabama garden, you can have the pleasure of consuming this delicious vegetable all season!

Common pests, diseases, and other challenges to growing turnips in Alabama

Growers must know potential problems with turnips in Alabama, such as pests, diseases, and challenges. Flea beetles are the most common pest in the area and can cause extensive damage to the leaves if not controlled. Southern blight is a fungal disease that can occur in warm and wet conditions, so proper ventilation and monitoring are vital to preventing its spread. It should also be treated with fungicides as soon as signs of infection are noticed.

Cold temperatures can kill turnip crops. To make sure they don’t die, plant them when the soil is between 45–75°F. Regular maintenance issues, like over- or under-watering, can lead to stunted growth, leaf damage, disease, and other problems. It would be best to ensure plants get enough water without becoming waterlogged. Rotation of crops every two to three years will also help reduce disease risk.

Weeds compete with your turnips for nutrients. Hoeing or hand-weeding around each plant will help provide optimal growth. Additionally, regular inspection for pests or signs of disease development is essential–if an infestation occurs, you should act quickly before it spreads further. Finally, organic fertilizers such as compost or manure may improve yields and avoid harsh chemicals that could harm beneficial insects or pollinators.

With proper care and attention, turnips have the potential to become a delicious and nutritious addition to your garden in Alabama! By taking preventive measures, like crop rotation and regular inspections, you can maximize their yield and avoid potential problems.

Harnessing the Sun’s Energy with Passive Solar Greenhouse

Harnessing the Sun’s Energy with Passive Solar Greenhouse

Have you ever wanted to use the sun’s energy to heat your greenhouse more efficiently? If so, passive solar heating is worth considering. This type of harnessing of the sun’s energy works by trapping and storing heat from the sun during the day and then releasing it at night. Read on to learn more about passive solar heating and how it can work in a greenhouse environment.

What is Passive Solar Heating?

Passive solar heating is a method of collecting, transferring, and storing energy from sunlight with minimal use of other energy sources. The idea is to have a structure that catches, stores, and distributes solar radiation as heat throughout the day. How this works in practice is that you install materials in your greenhouse (such as walls or windows) that absorb some of the sun’s radiation and store it for later use. This stored heat then radiates back into your greenhouse space during cooler nights when there isn’t direct sunlight, keeping your plants warm without having to use electric or gas-powered heating systems.

How Does Passive Solar Heating Work In A Greenhouse?

The basics of passive solar heating involve utilizing materials that absorb heat from the sun during hours when there is direct sunlight. These materials then store this heat until nightfall when they release it back into the greenhouse environment, keeping things warm even when there isn’t direct sunlight available. To make sure this system works correctly, you need to place these materials strategically around your greenhouse and also ensure proper insulation so that any excess heat doesn’t escape before it can be used. The most suitable materials for this are usually dark colored surfaces such as stone or asphalt which can absorb large amounts of light directly from the sun while still holding onto enough warmth to last through a cold night.

Passive solar heating systems are an efficient way to keep your plants warm without having to rely on traditional gas or electric powered heating systems. By strategically placing materials around your greenhouse which absorb and store heat from direct sunlight during peak hours of sunshine, you can ensure that your plants stay warm even during colder nights where there isn’t direct sunlight available. With careful planning and implementation, passive solar heating can drastically reduce your reliance on external sources of energy while also saving you money over time!

Designing the Perfect Passive Solar Greenhouse

If you’re looking to grow your own produce, creating a passive solar greenhouse is one of the best ways to do it. Not only is a passive solar greenhouse energy-efficient and inexpensive to build, but it also allows you to control the climate inside your greenhouse, giving you the perfect environment for growing healthy and delicious fruits and vegetables. Here are some tips on how to design a great passive solar greenhouse.

Location is Key: When building your passive solar greenhouse, it’s important to consider where you place it in relation to sunlight exposure. Find an area that receives maximum sun exposure throughout the day—ideally 6 or more hours of direct sunlight. Consider any potential shade from trees or buildings and make sure there’s enough room for air circulation around the structure.

Glazing Material Matters: The type of glazing material you use for your greenhouse will have an impact on its overall performance. Single-glazed polyethylene plastic film is lightweight and offers excellent UV protection, but it can be easily damaged by hail or strong winds. Look for a double-glazed option with two layers of plastic film that provides better insulation without compromising visibility or light transmission. You can also opt for rigid glazing options like glass or acrylic panels which provide better insulation but require additional support structures and may be more expensive than plastic films.

Orientation Counts: Orienting your greenhouse correctly is an important factor in optimizing its performance and efficiency. For maximum heat gain, position your structure so that the long side faces south while the short sides face east/west (depending on which hemisphere you live in). This will give you maximum solar exposure during winter when days are shorter while still allowing optimal ventilation during summer when temperatures tend to rise quickly inside greenhouses. Make sure all windows are facing south as well so that they get plenty of sun throughout the day and help keep temperatures warm at night.

Designing a passive solar greenhouse doesn’t have to be difficult if you follow these simple tips! Finding the right location with ample sunlight exposure, using appropriate glazing materials, and orienting your structure correctly are all essential steps in designing an efficient and energy-saving passive solar greenhouse that will help you grow delicious fruits and vegetables with minimal effort! Whether you’re a beginner gardener looking to save on energy costs or an experienced green thumb looking for new ways of controlling climate conditions within their greenhouses, following these tips should guarantee success! Good luck out there!

Fall Vegetable Garden in Alabama: What, When, and How

If you’re like me, you enjoy spending time in your garden all year long. Although the weather is turning cooler, it’s not too late to plant a fall vegetable garden in Alabama. In this blog post, I’ll share some tips on how to get started. So if you’re looking for something to keep you busy in the coming weeks, planting a fall garden is a great option!

What to Plant in Your Fall Garden

Some of the best fall vegetable garden crops include leafy greens and cruciferous vegetables. Leafy greens like lettuce, spinach and kale are fast-growing and can be harvested just a few weeks after planting. Cruciferous vegetables like collards, cabbage and broccoli are also great for fall gardens. They take a little longer to mature than leafy greens but are packed with nutrients.

fall vegetable garden
  • Broccolli
  • Brussels Sprouts
  • Cabbage
  • Cauliflower
  • Collards
  • Kale
  • Lettuce
  • Mustard
  • Onion
  • Pac Choi
  • Spinach
  • Swiss Chard

When to Plant Your Fall Garden Crops

The best time to plant your fall garden crops in Alabama depends on the type of crop you’re planting and the soil temperature. Leafy greens and cruciferous vegetables all have different planting and harvest times. For leafy greens, the best time to plant is September, October and November. For cruciferous vegetables, the best time to plant is September and October. Frost can slow maturity or damage some crops. Frost can also significantly increase the intensity and flavor of many fall vegetable crops.

How to Plant Your Fall Garden Crops

Planting your fall garden crops is easy! Just follow these simple steps:

  1. Prepare your garden bed by tilling the soil and removing any weeds or rocks.
  2. Sow your seeds or transplants in furrows or rows at the recommended spacing for each crop.
  3. Mulch around your plants to help retain moisture and keep weeds at bay.
  4. Water regularly and fertilize as needed.

That’s it! Just sit back and watch your garden grow!

Harvesting Fall Vegetable Crops

  • Broccolli – Most varieties mature in 60-80 days, but a few can take up to 100. Cut the center head out before the flowers begin to open. The side shoots will be harvest-able a few weeks later. Frost can damage the heads.
  • Cabbage – Varieties mature in 50-80 days with some taking up to 120 days. Each plant is only a single harvest by cutting the head out. Hard freeze frost can cause plants to begin to rot from the inside.
  • Collards and Kale – Can be harvested at any time. For a long and sustainable harvest, only remove the outer most leaves and the center will continue to grow new leaves. Cutting the center stem will terminate the growth of new leaves. The flavor intensifies with frost and plants can survive hard frost.